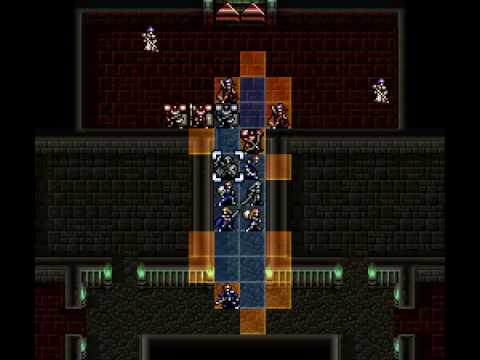
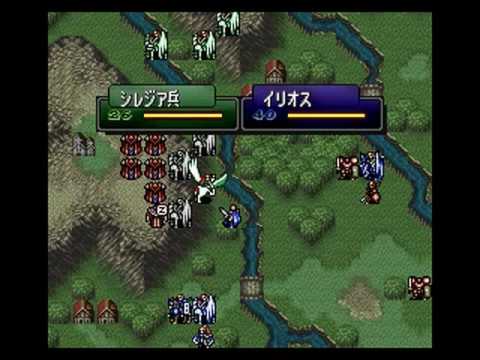
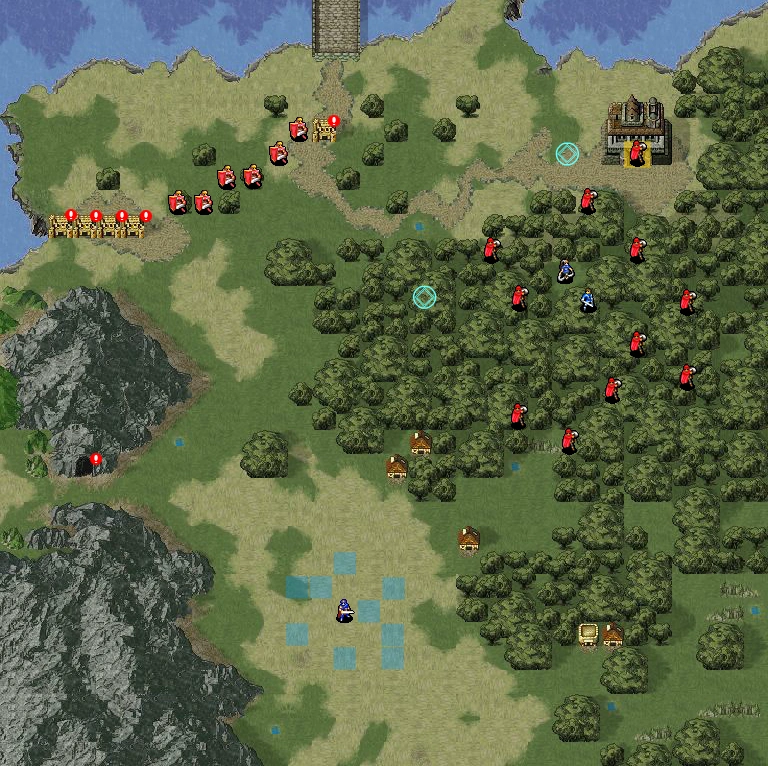
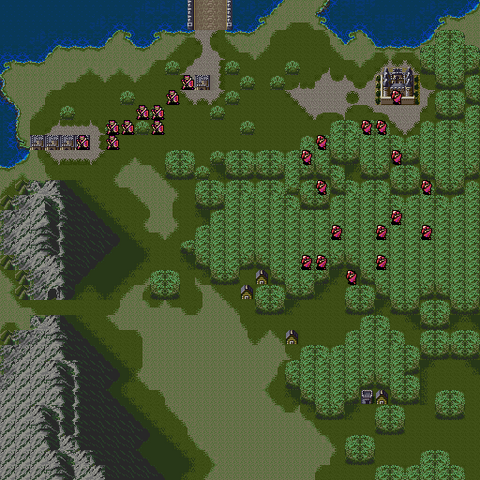
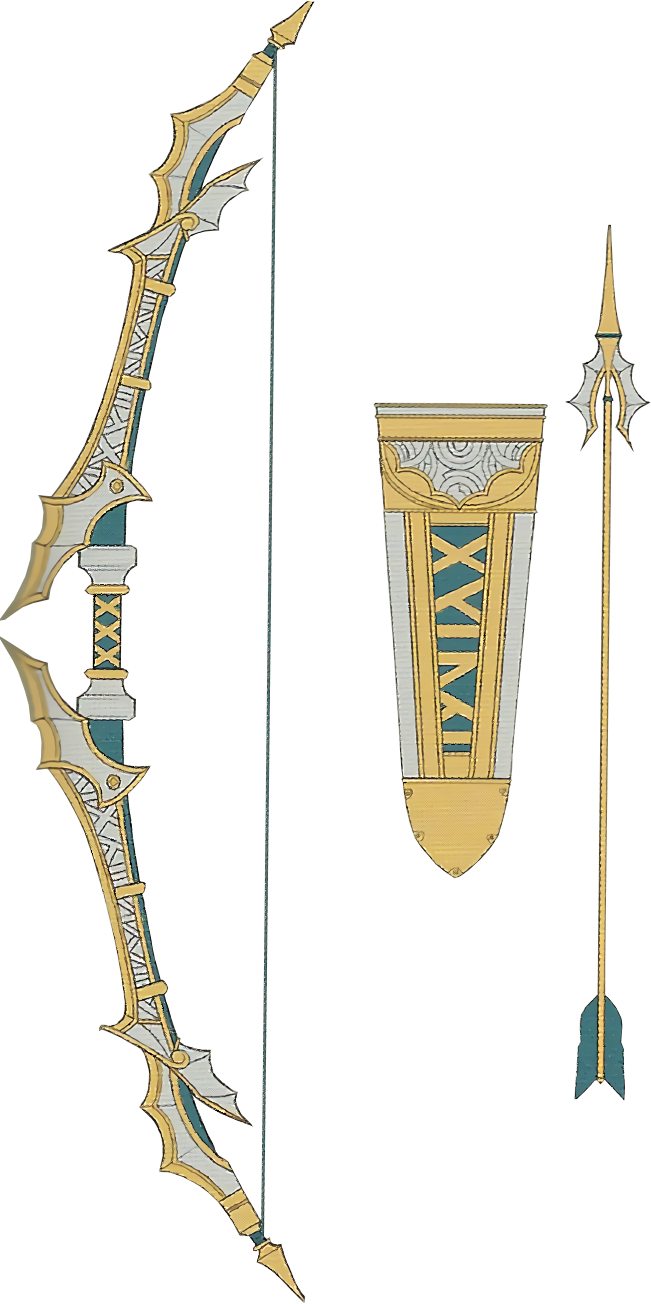
Sunday, December 9, 2018

1 of My Two Favorite Maps to Play On: Thracia 776 Chapter 6

My Favorite Maps to Play On: Thracia 776 Chapters 4 & 6

Chapter 6

Image result for thracia 776 chapter 6

And here we have another immensely enjoyable map to play on. This is one of those maps where there are different methods of playing it, but both can be enjoyable to play as. If the player rescued the NPCs from Chapter 4x then this map is the payoff as it gives a nice array of goodies. In this map you can get:

  • A Rapier
  • A Paragon Manual
  • A Knight Proof
  • An Odo Scroll (+ 30 % Skill growth and protection from non-Wrath critical hits)
  • A Pure Water
  • The Recruitment of Hicks
So yeah, there's a lot of sweet stuff you don't want to miss. But these items are out of the way and not necessary to completing the chapter. But you still want to get them. If you do go for the treasures then you've got one heck of a fight as the Grandbell soldiers will come after you.

Image result for thracia 776 chapter 6

This map is actively enhanced by the higher movement of your mounted and flier units. It's as if the designers knew what the player had at their disposal and decided to actively test the player's use and knowledge of these mechanics.

 The walls provide an obstacle that the player has to be smart about in order to overcome it. You could have Karin rescue drop your unmounted units, but that would still take a little bit of time even if you're not going for the treasures. So now you also have to make good use of both your mounted units and your thief. Why also the thief? Well somebody's got to unlock those doors. 

Related image

The way this map is set up makes the presence of enemies an anti-turtle measure all on its own. If you don't play fast then the enemies catch up and make your life miserable. If you take a really long time Raydrik and Galzus show up and by that point you're probably screwed so it's best to avoid them altogether. Before you get to them you have to deal with enemy cavaliers showing up on the right and left sides of the map.

One last point to bring up is that it's once again an Escape map. You know the drill by now. Get everyone to escape or they get left behind. This adds an extra element of fun to the mix as the player now has to decide how they will accomplish this, and how the rescue dropping can help with that.

To sum it up, this is an awesome map that gives you a lot of choices about how to approach it. It's also great because of how it turns enemies into turtle disincentives, which is a brilliant concept all on its own. What helps to make this map stand out is how it incorporates the mounting, dismounting, and rescue mechanics into the equation. It's a rare example of a map where higher movement and para-dropping enhance a map, rather than break it. 

1 of My Two Favorite Maps to Play On: Thracia 776 Chapter 4

My Favorite Maps to Play On: Thracia 776 Chapters 4 & 6

Chapter 4
Image result for thracia 776 chapter 4


In what I'm sure will come as a surprise to absolutely no one Thracia 776 Chapters 4 & 6 are my absolute favorite maps to play on. Let's start with Chapter 4.

What I love about this map is the absolute curve-ball it throws at the player. It's a curve-ball story wise because our heroes are scattered and in prison. Leif and your thief (Lifis / Rifis) are the only characters from the previous chapters who are still here. Every other character is new. 

It also starts the game with the main character IN JAIL. How often do you see a Fire Emblem game do something like that? The player only has three characters who aren't in jail, and you've got to make them work. The three characters, Brighton, Makua and Lara, aren't super powerful units (though they're not bad either) so busting out the rest of the cast can be a bit of a chore. 


Once you've done that the real fun begins. The characters in jail still don't have their stuff, which means that you're going to have to get it. That's where the treasures on the map come in. Anything that Leif or your thief had prior to this chapter are in these treasure chests. 

This adds A LOT to the chapter. It slows the player down, giving the enemy reinforcements extra time to show up and make your life miserable. It also adds to the map even if you see it coming when playing Thracia 776 again. If you know that Leif and Lifis are going to be the only characters left that forces you to think about which weapons and which items you want to leave behind with those characters. That's the exact mentality I used when I streamed Thracia 776. Speaking of my previous Thracia 776 stream....


This chapter is infamous for creating the Green Brigand meme. For those of who who could not watch my stream there was an amazing story that you had to be there to witness: One of the green NPC's had captured an enemy soldier while I was trying to escape through the top portion of the map. For those of you who haven't played Thracia 776 when you capture an enemy your stats are halved. So this NPC had his stats cut in half, his NPC allies dead and he was surrounded by enemies on all sides. So what does he do? He dodges the vast majority of attacks and proceeds to kill most of the enemies in his wake. It was glorious! I've never seen an NPC unit pull off a feat like that before. Not even the 3-13 archer in Radiant Dawn was THAT epic. It spawned a meme as we all pretended to worship. It's also the name of Guy's YouTube channel (which is where I got the picture from). That meme is one of the biggest reasons why I will always love Chapter 4 of Thracia 776.

Image result for thracia 776 chapter 4 green brigand

And I'm still not done talking about why this map rocks. Chapter 4 also has the added side bonus of the other NPCs. You see, if they all escape it leads to unlocking a Gaiden Chapter. This creates another interesting side objective. It makes the map difficult in the best possible way, because those enemy soldiers will do everything in their power to capture those NPCs. If those soldiers run off with them, gone goes the player's chances of Chapter 4x, the gaiden that nets you the all powerful Asvel. 

Something else I need to bring up is the way this chapter handles turtle disincentives. Like I talked about with Chapter 21x, this game doesn't throw a ton of enemy reinforcements at you all at once. Instead, it only sprinkles enemy reinforcements in little bits at a time. No individual "sprinkle" is lethal on its own, but what defines the pressure here is the gradual build-up over time. It's a creative way of handling turtle disincentives. 

Image result for thracia 776 chapter 4


Last, but not least, there's a bottle-neck up at the top. This is the final part of the map where enemy mages and Armor Knights try to slow the player down while enemy soldiers down at the bottom race to the top to try and catch up with the player. So as a result, the player's trapped and has to fight out of that trap even faster if they want to win. There are a couple of mages that can make the player's life miserable. There's also a recruitable Armor Knight called Dalsin (whose name always reminds me of a certain character on Street Fighter). 

Let's not forget that this is an Escape chapter, which means that everybody needs to escape if the player wants to use them in upcoming chapters. This adds an extra layer of strategy on top of the excellent elements this chapter had to offer. Now you have to think about who's going to escape first and who's going to stay behind and fight off the bad guys. 

At the end of the day, Chapter 4 is GENIUS in its design. It just does everything well. In addition to all that it spawned a pretty funny meme. What more could you possibly want?

Top 10 Favorite Maps to Play On (Part 3)

# 3: Thracia 776 Chapters: 17A & 21x

Chapter 17A


I like this map A LOT. So much so in fact that I've already gushed about it on my blog. Here is the link for your enjoyment:

https://thecrusadergrant.blogspot.com/2016/09/analyzing-thracia-776-chapter-17a.html

I'm going to try and approach this from a different angle this time. The more I thought about it, the more I realized that this map in particular was kind of like 10B / 11A in Binding Blade. 

Both maps are the kind that give the player A LOT to do and put said player in a position where if they want to get all the goodies then they need to play really fast. It was a close call between both versions, but what gives Thracia the edge in this case is that it's less frustrating to play. As someone noted when we talked about 10B / 11A, there are suicidal NPC's that can be frustrating to deal with. I agree with this assessment, but I still love those maps regardless. 17A has all the benefits of 10B & 11A without the drawback. 

Image result for thracia 776 chapter 17a

It also has an additional turtle disincentives that can put a lot of pressure on the player:

  •  First, Cyas appears. Cyas's presence alone boosts enemy hit rates and avoid by 30 %, meaning that he can make ordinary enemy mooks significantly more challenging to deal with. Cyas has the Sleep staff at his disposal, which will make your life even more difficult.
  • In addition to Cyas appearing, there will be a three-tile bridge that will form, allowing that army of Armor Knights to cross. And don't forget, this army will be boosted by Cyas's leadership stars.
  • Then another boss appears with an army of Mage Knights. They show up right where the player used to be. They too, will have their stats boosted by Cyas's leadership stars.

Fortunately Cyas will leave after a few turns, but by that point the player has to deal with the map putting them between a rock and a hard place. Overall, this map is amazing and it continues to stay that way.
______________________________________________________

Chapter 21x

Image result for thracia 776 chapter 21x

You know, I'm not a fan of how most gaiden chapters are designed. They can be a bit gimmicky, they generally tend to be short and there's a good chance that there will be Fog of War on those maps. Chapter 21x has none of that nonsense. More importantly, it's a capture paradise! There's a lot of Warp staves and Thoron to steal on this level and trying to get them all is what makes this map so much fun. The treasures at the middle of the map are also good too since you get a Knight Proof, Bolting and Unlock staff. 

This map also does a great job of putting pressure on the player in the form of enemy reinforcements. What this map does that's so interesting is that it sprinkles enemy reinforcements all throughout the map. And it does so consistently enough so that it can build up over time. It won't punish you at first, which can lull the player into a false sense of security. But if the player does not heed the game's warning, they will suffer the consequences. 

Image result for thracia 776 chapter 21x

In order to unlock this map, at least one of the player's characters has to be captured. It is admittedly weird and counter-intuitive to purposefully let one of your units get captured, but for me it's forgiven by the fact that it makes for an interesting side objective. It gives the player one more reason to push forward. So what this map ultimately gives the player is the potential to capture and steal some really sweet items, get their captured allies back and unlock some goodies all while the game puts pressure on said player. This map gets my vote for "Best Designed Gaiden Chapter In The Series."
____________________________________________________

 # 2: Thracia 776: Chapters 9 & 13


Chapters 9 & 13 are on here for essentially the same reason: They're extremely fun Escape maps. Their set-up is the same which is why I like them equally. In both maps the player is set on the opposite side of the map and is asked to reach a spot on the map that is being attacked by enemy units. It's a great set-up in both a gameplay sense and in a story sense.

These maps have houses you can visit that add a little extra spice to the chapter. They act as detours for the player and can slow said player down, but in both chapters the treasures contained are worth it. In chapter 9 you get the Fala Scroll at the village that's on top, and Stamina bags for the village down below. The Fala Scroll gives a + 5 % growth to Strength and Magic in addition to a + 10 % growth to Skill and Speed. It also protects the player from non-Wrath critical hits, which is especially helpful in this chapter since the Wyvern Knights at the bottom of the map, including the boss, all have Killer Lances. 

Related image

The Stamina bags on the bottom are a HUGE boon. It's rare for this game to outright sell Stamina bags so whenever this game hands an opportunity like that on a silver platter you take it. Stamina bags let the player use their units as much as they want without having to sit out the next chapter. They're fun to use, but they only show up every now and then. These bags are at the bottom of the map, which means that they have a catch to them. You'll have to cut down Armor Knights, a bishop and potentially suffer the wrath of Wyvern Knights equipped with Killer Lances. Plus while you're dealing with that, the enemy army marches on. Tick-Tock. Tick-Tock. 


In Chapter 13 the villages basically give you armor slaying weapons to help you deal with the legion of Armor Knights and a Knight Proof. Again, the design choice is ultimately the same: Place treasures in areas that force the player to go out of the way to reach them, but still make it worth the players' time. As a result there's a cost-benefit analysis that the player has to make when approaching this level.

Another interesting design element is that both maps have their escape points defended by playable units. There are playable characters, and in Chapter 13 playable non-portrait mooks. This gives the player an extra element of choice. While you're trying to play catch-up you also have to defend those spots. The defenders aren't very strong so there's actual tension. 

Related image

Last, but not least, these are Escape chapters; which means that if the player wants to beat the map and still have every unit available in the next chapters, they'll have to make sure that everyone escapes. This puts an extra emphasis on the player to choose their units carefully. And considering the fact that both chapters only allow a relative handful of units to be used the suggestion here is to pick wisely.

On a last minute note, it's fun to warp a promoted Asvel to a forest tile on Chapter 13 and see him wreck face. It's even better when you kill the boss, because after he dies the majority of the Grandbell army retreats like total wusses. Even breaking Thracia 776 is a heap of fun.

Sunday, December 2, 2018

Top 10 Favorite Maps to Play On (Part 2)

# 7 - Conquest Chapter 16


Wait a second. Is Grant saying that he likes playing a Conquest map? 


Yep. I find Chapter 16 of Conquest to be a very fun map to play on. First of all, I’m a sucker for creative anti-turtle measures and this map definitely has one. The player starts the map with 10,000 gold and then loses 300 each round. That’s brilliant! There’s always going to be a sense of urgency because who wouldn’t want to have a lot of gold? I usually get around 9,000 gold whenever I beat this map.

This map also does a great job at throwing a variety of enemies at you, which is something I’ve always appreciated. You have Mercs, Berserkers, Sorcerers, Bow Users, etc. This requires the player to diversify their army in order to beat the map. What’s even better is that these enemies also use a creative variety of weapons. Wyrmslayer. Armorslayer. Bows. There’s bound to be a weapon that will deal effective damage against at least one of your units so you also have to pay attention to you’re fighting and what they’re carrying. As if that weren’t enough, this map also contains clever positioning of status staves so your every move really counts.


Image result for fire emblem conquest chapter 16


Last, but not least, this map forces the player to move in four different directions. In order to find the boss the player has to talk to four different lancers. The boss, Shura, will always be the last lancer. This is a really neat twist since this map gives the player control over where they want the boss to be and how they want to deal with him. Shura has Counter so you do have to proceed with Caution when you fight him, once again reinforcing the fact that you have to be careful and strategic when playing this map.

Then comes the most meaningful choice in Fates: Shura or Boots. And in the most hilarious way possible, the Boots wind up being the more meaningful choice. This map is the gift that keeps on giving. It’s extremely creative in its design from start to finish and it never stops being fun for the player.
____________________________________________________

# 6 - Conquest Chapter 8
Image result for conquest chapter 8

This map feels like a fast paced roller-coaster from start to finish. The player must traverse a lake in order to beat down a boss with Nosferatu on the other side of the map. This map also has a creative means of encouraging the player to play faster: The villages. Visit 3 villages by the end of the map and you get a whopping 10,000 gold. 10,000 gold is significant. You want that money. The map gives the player a “freebie” village and then you’ve gotta earn the other two.

The map also gives the player different paths to approach, which is always a plus. Then there’s the Dragon Vein. This map gets my vote for having the best use of Dragon Vein. Here you can either freeze the lake over, giving yourself passage to the other side, or you can unfreeze the lake and prevent enemies from ever reaching you. This gives the player options and forces the player to weigh said options when thinking about how to approach the throne. 


Related image

The enemies in this map are simple, but effective in their design. Sorcerers and Fighters hit really hard and in this game they have an accuracy that can be taken seriously.

Flora’s status staff also adds to the level as it slows the player down. She also causes the player to think twice about their positioning. Flora’s stronger than the average enemy on this map so you’re going to need an over-leveled Corrin to wreck her. The last element of this map that I enjoy is the boss: He’s a mage with Nosferatu. You definitely have to think twice about how to approach the boss because simply charging forward guns a-blazing will get you killed while the boss is at near full HP. There’s also the fact that it’s a two range weapon which means that you’ll have to watch your step.

All-in-all it’s a fun, fast paced map.

_____________________________________________________

# 5 - New Mystery of the Emblem Chapter 22
Image result for fire emblem new mystery of the emblem chapter 22

This map for me is the epitome of "play fast or die". From the first turn onward enemy reinforcements show up behind you...and they don't let up. Enemy reinforcements will continue to add up and pile on until either you win or you die. The map is mean by placing treasures off to the side. Both of the treasures are dragon killing weapons, which are extremely useful at this part of the game. But doing so usually gets you killed. 

This map has carefully placed mages with ballistic siege tomes that will make life miserable for you if you're not careful. All the Dragons and Berserkers can hit HARD too so you have to be extra careful. There are two entrances to the throne and no matter which one you take you pretty much have to charge in "guns a-blazing" because otherwise they're going to kill you.

All the while more and more enemies will show up behind you and will chase you at a relentless pace. The map feels like a giant obstacle course where the price of failure IS DEATH! And I will always love this map for it.

______________________________________________________

# 4 - Binding Blade Chapter 10B / 11A


These maps are wonderfully chaotic in the best possible way. The reason why I'm listing these two is because they play the exact same way. So let's take a look at all the wonderful side objectives that these maps provide:

  • Recruiting Echidna, Klein and Tate
  • Rescuing multiple villages
  • Obtaining several promotion items
This map will keep you busy in the best possible way. Recruiting Klein and Tate is a little tricky. What's even more tricky? Trying to recruit them without killing a single member of their respective armies. That requirement is the epitome of "frustrating, but in a good way." The reward for keeping their NPC armies alive is that you get a promotion item. One of them is an Elysian Whip, which you can use to promote Miledy. The other one is an Orion Bolt, which can either promote Shin or provide a lot of money.

Image result for fire emblem binding blade chapter 11a

The villages will also be threatened too, so if you didn't get the message PLAY FAST! According to the wiki the villages net you "Visit 8 villages for Restore, Dragonshield, 5000G, Speedwing, Orion's Bolt, Sleep, Axereaver, and an Angelic Robe". So yeah, there's a lot of valuable stuff. Definitely worth saving if you ask me. Bytheway, if you save all the villages you'll get a Hero Crest. It's as if these maps are going overkill in rewarding the player. I like overkill. 

In both maps Echidna will also be threatened by enemies. As if we didn't already get the memo it's blatantly clear that if you want all of the wonderful goodies you're going to have to earn them....and I freaking love it. I wish more Fire Emblem maps would require the player to be this busy. It keeps you engaged because there's never a dull moment and there's an immense feeling of satisfaction that comes from getting everything because you know that you earned it.

Saturday, December 1, 2018

Top 10 Favorite Maps to Play On (Part 1)

The next suggestion for a blog series came from Alan. He suggested “Top 10 Favorite Maps”. Here I’m limiting it to gameplay so this will be a “Top 10 Favorite Maps to Play” list. Feel free to mention maps that you like to play as you follow this list along.

# 10 - Mystery / New Mystery of the Emblem Chapter 2


Here is an example of a fun early game chapter to play. Recent Fire Emblem early game chapters tend to go easy on the player, but this one throws a couple of curve balls at you. First, there’s the thief with the droppable Lady Sword. It’s a fun puzzle to try and solve, as the Lady Sword is an absolute must-have.

What’s even more cool is that it’s a map where the boss actually moves off his throne. This has a lot of fun implications too since he’s a Wyvern Knight. In the SNES version he wields a Knight Killer, which can basically wipe out a good chunk of the characters in the player’s army by this point.

With the boss having such high movement the player is put into a position where their every move matters. If I’m not ready to take on the boss then that’s a reset for me. This forces me to pay attention, and its made me appreciate the map for it.

Just to recap: This map is very fun to play on because of a well executed "thief drop" and because of a boss who enhances the level of thought and strategy required to play it.
____________________________________________________

# 9: Mystery / New Mystery of the Emblem Chapter 7


This is the map where you get Navarre and Feena. There are a bunch of thieves who are actively running away from you who drop some pretty awesome items. This makes the chapter fun because it rewards smart decisions. If you kill the thieves quickly you get stuff like a Star Shard, a Seraph Robe, promotion items or a bullion in the remake version.

What I like about this map is the creative way it gets you to play faster. If you want to get all the stuff, you need to be able to reach those thieves in the quickest period of time possible. It's a map where the presence of forest tiles actually make sense because it's acting as a buffer between the player and the thieves. The addition of Navarre and Feena is an interesting choice that increases the player's options. In terms of which thief do you want to strike down first.

File:FE3 Chapter 7 Map.png

The presence of Astram's mercenaries also adds to the quality of the map. They're so strong by this point in the game that the player will try to avoid them whenever possible. This has two implications: 1) If the thieves run within the mercenaries range it creates a "safe zone" for them that the player can't get to. After all the player doesn't want to get wrecked by said mercs.

2) Once the mercs start chasing the player, they act as a turtle disincentive. It's the game's way of getting the player to hurry up and beat the level.

Since the leader of these mercs is recruitable later on, it further incentivizes the player to avoid combat with these mercs too.

Just to recap: I love this map because of the excellent "thief drops" and for its clever positioning of powerful enemy mercs, which make the map more fun to play.
________________________________________________

# 8: Binding Blade Chapter 7
File:FE6C7.png

This is one of those maps that I file away under “frustrating, but in a good way”. This map is unrelenting. It starts by putting several recruitable NPCs in danger. As if that weren’t enough these NPCs are in a fighting mood, which makes your life more difficult. The enemies in Hard Mode are powerful, especially those tanky wyverns. This means that you’re gonna have to fight HARD if you want to get those recruitable characters.

The map is also kind enough to give the player a host of valuable stuff. From a Killing Edge, to a Physic to a Red Gem this map really dishes out the goods.

So you’ve beaten the first wave of enemies and you think the rest of this chapter will be a breeze. Then the map throws a curve-ball at you.


Suddenly more enemies appear. So once again, you either play fast or die. You’ve gotta rush to the throne and the boss is no push over. It’s a very well designed map that forces you to play fast, then lets up (lulling the player into a false sense of security) and then throws a very effective turtle disincentive at you. It’s a great example of a map that’s tough, but fair which makes it a memorable and rewarding map to play.

Saturday, November 3, 2018

It was the Best of Weapons, It was the Worst of Weapons Part 4

Shadow Dragon & New Mystery of the Emblem

Best Weapon for both games: Lances

Worst Weapon in Shadow Dragon: Swords
Worst Weapon in New Mystery: Axes

Wing Spear | Fire Emblem Wiki | FANDOM powered by Wikia
In both of the Marth DS remakes Lances are really good. The main reason is basically the same: They provide a plethora of weapons that deal effective damage against a wide variety of enemy units that simply need to die.


These weapons are:
  • Caeda’s Wing Spear
  • Ridersbane
  • Dragonpike
  • Flycatcher (in FE 12)
Caeda’s Wing Spear breaks Shadow Dragon. It’s still a great weapon in 12 even if it doesn’t snap the game in half. Dragonpike is also really good since dragons tend to be powerful enemies (especially in 12). Ridersbane is also a plus, even if other weapon types have their own version. Flycatcher is more like whipped cream on top of a great sundae. 

Rapier - Fire Emblem Wiki

In Shadow Dragon swords are deemed the worst weapon type because:

(a) Consistent weapon triangle disadvantage since most of the enemies are lance wielders. This hurts swords even more since that means that sword wielders don’t get to take advantage of their juicy weapon rank bonuses.

(b) lower average might in a game where accuracy is more or less guaranteed.

Wyrmslayer Sword (Dragon Killer) from Fire Emblem ...

According to Ronaldo the reason why axes are the worst weapon type in FE 12 axes is because: "Swords and Lances have dragon killer weaponry and other utilities, Magic has Nosferatu, Bows have Parthia and early utility against dracoknights...Axes are simply the least useful."


Awakening
Best Weapon: Tomes.
Worst Weapon: Bows


Fire Emblem: Awakening Tomes | Cosplay Amino

Yeah tomes are the best weapon in Awakening. You knew it. I knew it. We all knew it. Tomes give their users access to powerful weapons like Celica’s Gale, Nosferatu, and a host of other powerful weapons.

In Awakening the map objectives are “rout enemy” or “kill boss”. This means that weapons with consistent 1 - 2 range are important and weapons that can keep you alive while facing off against powerful groups of enemies are going to be more valuable.

Awakening also makes weapons like these more accessible than they otherwise would be in any other Fire Emblem game. The fact that you can forge both Celica’s Gale and Nosferatu also means that they’re going to be even more powerful than before. Combine Armsthrift with Limit Breaker and these weapons will never break.
Fire Emblem: Awakening Part #23 - The Mad King Gangrel ...

During the previous post I said something about why bows are the worst weapon type in Radiant Dawn:
"Radiant Dawn also adds insult to injury by having a significant portion of the game be the "Rout" objective. The reason why this matters is because "Rout" heavy games tend to benefit powerhouse units who can wipe out huge enemy armies during the Enemy Phase. Since archers can't counterattack 1 range enemies on the Enemy Phase that means that there's a significant portion of the game where they simply cease to exist."
Unfortunately that same line of reasoning also applies to Awakening. When you have a Fire Emblem game that has a significant number of “Rout Enemy” chapters the end result is that a lack of Enemy Phase combat prowess is going to hurt your performance. Bows don’t have 1 - 2 range so they don’t exist during the Enemy Phase.
Bronze Bow | Fire Emblem Wiki | FANDOM powered by Wikia


Fates
Best Weapon Type: Hidden Weapons and Magic
Worst Weapon Types: Bows 


So why are Hidden Weapons on this list? There are mainly two reasons:

a) They can debuff enemies

b) They have 1 -2 range while not having the same drawbacks that most 1 -2 range weapons have.

Flame Shuriken | Fire Emblem Wiki | Fandom powered by Wikia

If you’re wondering why Magic is on here a lot of it has to do with the Horse Spirit. Horse Spirit is a scroll that gives its user a + 3 to Skill, Speed, Defense and Resistance without any drawbacks. Since it’s a tome it automatically has 1 - 2 range. So basically we have a 1 - 2 range weapon that gives very good stat boosts without any drawbacks or penalties. That already separates it from the vast majority of the other weapons in the game.

In case you’re wondering why I picked bows for “worst weapon type” it’s because Revelations and Birthright are also rout heavy games, which means that the lack of an Enemy Phase still screws them over.

Sunday, October 28, 2018

It was the Best of Weapons, It was the Worst of Weapons Part 3

Axe - Fire Emblem Wiki

So I’m grouping Fire Emblems 7, 8, 9 & 10 together because they all have the same best weapon types and the reasons why are the same. So with that out of the way let’s begin.

Fire Emblems 7 - 10 
Best Weapon Type: Axes


By this point in time Kaga was long gone and it seemed like the new guy in charge must have really liked axes. So why are they now considered to be good? 

Hand Axe - Fire Emblem Wiki


1 - 2 Range Weapons Got Gud: Hand Axes are significantly better in these games which means that axe users have the benefits of attacking at distance while also being able to defend themselves at melee range. In the Tellius games you can even create forged Hand Axes that have all the positives of regular hand axes without any of their downsides.

2. Their accuracy issues are no longer a problem, but their higher might still remains: One property that axes retain is that they have higher might on average than their lance or sword counterparts. The big change here is that axes aren’t as inaccurate as they were in the past.

One major reason for this is that enemies in these four games are predominantly lance users so wielding an axe means that you get weapon triangle control over a lot of them. That’s an extra + 10 / + 15 accuracy right there.

Steel Axe - Fire Emblem Wiki - Wikia

Enemies in Fire Emblems 7 - 9 are notorious for being easy to kill. One of the reasons why they’re easy in this case is that they weigh themselves down to the point where hitting them isn’t difficult to do anymore.


3. Axes stopped weighing their wielders down:
In the first four Fire Emblem games the Attack Speed formula was basically “Speed - Weapon Weight”. This basically meant that if you wanted to double attack you needed a high Speed stat and a weapon with low weight. This formula screwed axes over since they would always weigh a lot. Then came Fire Emblem 5 which decided to change that to:

Speed – (weapon Weight – Build, 0 if negative)

This means that weapons can still have higher weight without flushing their wielder’s Attack Speed down the toilet. Then the Tellius games switched “Con” to “Strength” which further reduced the relevance of weapon weight to everyone except for magic users. While this one doesn’t automatically make axes good on its own (FE 5 & 6 say hi) it does play a role in making them more viable weapons. Then you combine reasons # 1 & 2 and suddenly its not so surprising that axes don’t suck anymore. One more thing to note: Axes also have more variety in these games than they did in the previous entries which gives axes users more tools to deal with specific problems.

Silver Bow - Fire Emblem Wiki


Worst Weapon Types for FE 7, 8 & 10: Bows
While axes got a huge upgrade bows basically remained the same. Bows have always been restricted to 2 range in Fire Emblem but the difference was that in the past Hand Axes weren’t good weapons. They either had crappy accuracy or their weapon weight mattered more. In these games that’s no longer the case. Hand Axes (and javelins) have the same range as the average bow, but they also have the extra perk of being able to defend their wielders at close range, which is something a bow cannot do. At least bows can still deal effective damage against fliers right? Well that’s not a big deal anymore because all the enemies suck so the extra damage is superfluous. 

Radiant Dawn also adds insult to injury by having a significant portion of the game be the "Rout" objective. The reason why this matters is because "Rout" heavy games tend to benefit powerhouse units who can wipe out huge enemy armies during the Enemy Phase. Since archers can't counterattack 1 range enemies on the Enemy Phase that means that there's a significant portion of the game where they simply cease to exist. 

Dagger (weapon) | Fire Emblem Wiki | FANDOM powered by Wikia


Worst Weapon Type for Path of Radiance: Knives
While bows contain all the same problems in Path of Radiance as they do in the previous games the big difference here is that knives suck even more. There are three knives in Path of Radiance. Just three. The strongest knife in Path of Radiance has only a measly 8 might, which is on par with a Steel Sword. None of the knives in Path of Radiance have range and for some strange reason you cannot forge them. Why do knives exist in Path of Radiance again?

Saturday, October 27, 2018

It was the Best of Weapons, It was the Worst of Weapons Part 2

Holy War

Image result for fire emblem 4 swords

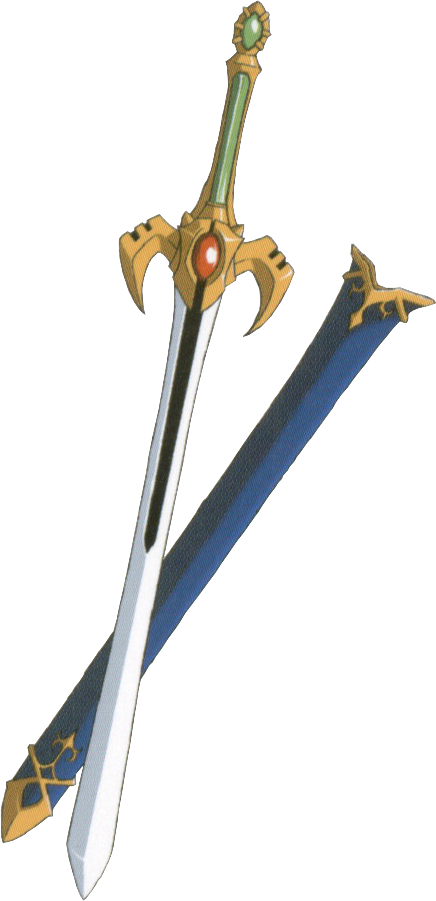
Best Weapons: Swords & Wind Magic
Worst Weapons: Axes & Fire Magic


I’m sure this ranking comes as a surprise to nobody, but let’s analyze this anyway. First, let’s compare and contrast the various weapons by starting with the anima tomes.

Wind Tome

Mt: 8
Weight: 2
Hit: 90

Thunder Tome
Mt: 8
Weight: 7
Hit: 90

Fire Tome
Mt: 8
Weight: 12
Hit: 90

Between these three tomes the only difference is in their weight. The wind tome has the lightest weight which means that the wielder will experience the least attack speed reduction. The Fire Tome has the highest weight which means that your attack speed is going to drop like an anchor, which means that you’ll easily get double attacked by enemies.

This pattern applies to the higher ranked anima tomes as well (which you can see for yourself here: https://serenesforest.net/genealogy-of-the-holy-war/inventory/fire-thunder-wind/).

They all have the exact same might, usually they’ll have the same accuracy, but the wind tomes will ALWAYS have lower weight. This means that the wind tome user can deal just as much damage as their lightning or fire wielding counterparts, but they also get the added bonus of having higher avoid and being able to double attack (assuming that they have the Pursuit skill).

Image result for fire emblem 4 wind magic

Assuming that you have the same weapon ranks in anima magic, there is zero reason to ever use thunder and fire magic over wind. Wind magic is also the only anima magic type whose Regalia can be used by the player, and if you pair Lewyn and Tiltyu together you can use the Holsety tome from the end of Chapter 4 until the last chapter of Holy War, which is the longest period of time you can ever have a Regalia for.

Swords and Axes operate under a similar line of logic. The main difference here is that axes have significantly higher might than swords, but their weight is also absurdly high. For example, compare and contrast an Iron Sword with an Iron Axe:

Iron Sword
Mt: 6
Wt: 3
Hit: 80

Iron Axe
Mt: 14
Wt: 18
Hit: 70

An Iron Axe has more weight than might, which is pretty awful. Sure it has more than twice as much might, but that still doesn’t change the fact that you’re basically going to have non-existent attack speed. Even if the axe-user doesn’t have the Pursuit skill they’re still going to have terrible avoid.

Once again, this pattern is applicable to swords, axes and lances. Axes will have high might, but their weight is absurdly high and their accuracy will generally be either average, or it will be bad. There are also only 6 different kinds of axes: Iron, Steel, Silver, Brave and the Hand Axe plus the Helswath. By contrast, there are over 4 times that many swords. Also, all 3 sword regalia will come under the player’s possession at one point in the game or another. The Axe Regalia doesn’t.

Image result for fire emblem 4 fire tome

Something else I almost forgot to bring up is that magic swords are actually considered to be good 1 - 2 range in this game. For example, give Sigurd Ethlin’s Light Brand and stick him in the forest at the beginning of Chapter 4. It’s pretty hilarious how low the accuracy of the Wind Mages will be. Even Mekkah suggested that Alec and Noish with magic swords are actually pretty good units:

https://www.youtube.com/watch?v=OQOTKuXYwz8&index=6&list=PLA69XE9lKaI64aDqHYvng0U9jpYF1dslC

To Sum it up: Swords and wind magic are super light weight, which grant their users more avoid and will guarantee that characters with the Pursuit skill will be able to double attack. Axe and Fire Magic are really heavy and will have sub-par accuracy.

____________________________________________________________

Thracia 776
Best Weapon Types: Wind Magic & Swords
Worst Weapon Types: Dark Magic & Bows
Related image

Well would you look at that? Wind tomes and Swords are once again the best weapon types. It feels like deja vu all over again. The reason why wind tomes are the best weapon type here is less obvious than in Holy War. Wind tomes still have the lightest weight on average (although Thunder tomes do a better job of giving them competition) while maintaining great damage output. Plus Wind tomes give the player not one, but two OP Prf rank weapons: Grafcalibur and Holsety. Blizzard is also the best of the three ballistic siege tomes due to its ability to inflict the Sleep status on enemies. In Thracia, statuses can last forever unless you use a Restore staff. So inflicting a status is a much bigger deal here.

Swords once again have the greatest variety in their arsenal compared to axes or lances. Swords also have better accuracy too. Most lances on average have between 65 - 70 accuracy while most axes have between 50 - 65 accuracy. Some swords have between 55 - 65 accuracy, but the difference here is that there are also a significant number that have 70 accuracy or higher, which is something that the other two can’t say. Once again swords have favorably low weights as well, meaning that sword users as a whole will suffer less attack speed penalties.

Related image
Unlike Holy War Thracia 776 tends to give the stink eye to different weapon types. Let’s start with Dark Magic. There are only two Dark Magic tomes that can be used by the player: Yotsmungand and Fenrir. Everything else either turns into Fenrir when taken upon capture or can’t be used by the player at all. As if that weren’t bad enough Dark Magic is ridiculously heavy. You know you’re doing something wrong when the lightest weapon of your type is at 12. Be prepared to watch that attack speed flush down the toilet. The Fenrir tome also only has 5 uses. Yikes. 

Bows lack 1 range, which hurts them a lot in this game because it means that bow users cannot capture at all. Bows also have a terrible might to weight ratio in Thracia 776. All of the lower ranked bows have weight that are either greater than or equal to their might, which is awful! Their accuracy is also on par with lances too on average.

____________________________________________________________
Binding Blade

Best Weapon Types: Swords and Dark Magic
Worst Weapon Types: Axes and Light Magic

Image result for fire emblem 6 apocalypse

Once again swords reign supreme. Swords in Binding Blade tend to have fantastic accuracy in a game where accuracy is actually an issue. There are plenty of axe wielding enemies as well so sword users get a nifty weapon triangle bonus whose usefulness is bolstered by the fact that axes can’t hit the broad side of a barn in this game. Once again swords have low weight which is very favorable for them especially in comparison to lances and axes who do not have favorable might to weight ratios.

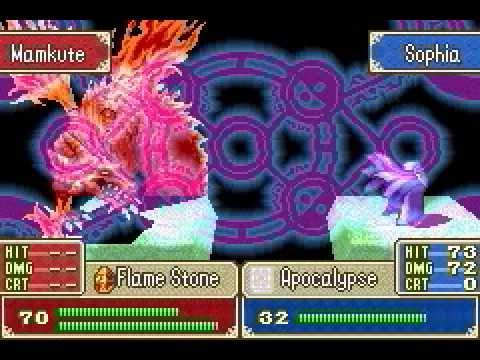
You might be wondering why Dark Magic is considered to be one of the best weapon types. Well for starters Dark Magic gives you Flux and Nosferatu, which have reasonable accuracies and favorable might - weight ratios. Nosferatu is also a godsend in Hard Mode where enemies can hit like a truck. Apocalypse has great firepower too for a Regalia in FE 6. 18 might and a + 5 Magic boost are pretty sweet. 

Image result for fire emblem 6 memes

Now to the worst weapon types. Axes are notorious (and rightfully so) for having craptastic accuracy. Armads is the only axe in the game that has higher than 65 accuracy. That’s really sad. Most axes have a weight that’s greater than or equal to their might which means that you’ll also get weighed down extremely fast.

Light Magic is considered one of the worst weapon types in the game mainly because it doesn’t really have anything good going for it. Anima has Aircalibur (and anima magic as a whole is more accurate in this game) while Dark Magic has Nosferatu and a better Regalia to boot. Light Magic just doesn’t contribute anything meaningful or substantive so it gets left behind.

Friday, October 26, 2018

It was the Best of Weapons, It was the Worst of Weapons Part 1

Image result for fire emblem weapon types

One of the suggestions I got for a future blog post was talking about which weapon types were the best and worst. The thing about this topic is that a one-size-fits-all approach doesn’t work. Each Fire Emblem game has at least a few differences in how their mechanics work. These differences in mechanics and design affect the overall quality of the different weapon types. This means that I’ll have to rank the quality of each weapon type by game because each game is different enough to warrant its own discussion.


Before I begin, I’d like to thank Ronaldo for helping me out with these lists. This would have been pretty daunting to make without you buddy.

FE 1 & 3


Best Weapon Type: Swords
Worst Weapon Type: Axes


First, let’s start with why axes suck in FE 1 & 3. For starters, there are only 5 different kinds of axes in both games:

https://serenesforest.net/dark-dragon-and-sword-of-light/inventory/axes/


Image result for fire emblem weapons

Axes also tend to weigh a ton. For example an Iron Sword has 2 weight in both games while an Iron Axe has a weight of 7. Sure the Iron Axe has + 3 might over the Iron Sword, which means that it will deal more damage, but the Iron Sword dramatically increases your chances of double attacking enemies.

Generally speaking double attacking is a better way of increasing damage output than having one strong swing. This is a big reason why swords are considered the best weapons in both of these games: Their weight is super low, which means that you’ll have the easiest time double attacking enemies. Swords also provide the highest variety of weapons that let you deal with different foes.
Image result for fire emblem weapons

You’ve got swords that deal effective damage against dragons, armored units, increase your chances of landing a crit and in FE 3 there are swords that deal effective damage against thieves, pirates and mercenaries. Indoor maps in FE 3 also make swords a more preferred choice since they become the default weapon for a significant percent of your army.


Additional Notes From Ronaldo
  • Levin Swords are potent 1 - 2 range weapons in Fire Emblems 1 & 3. The reason for that is that enemy resistance just doesn’t exist which means that you can get a lot of mileage from them. 
  • Also, the Rapier is game-breaking in Fire Emblem 1 and it’s a sword. Meanwhile both Mercurius and Falchion are also powerful weapons and they are swords.
________________________________________________

Image result for fire emblem echoes


Gaiden & Echoes


Best Weapon Type in Gaiden: Swords

Worst Weapon Type in Gaiden: Lances


Best Weapon Type in Echoes: Bows

Worst Weapon Type in Echoes: Magic


You’re probably wondering why Gaiden and Echoes have different Best / Worst Weapon Types. Let’s start with Echoes since that’s the game that most people have played here. Magic is the worst weapon type in that game because of the following reasons:

  • It reduces the HP of the caster making them easier to kill. Also, if said caster doesn’t have enough HP to cast the spell then they’re effectively useless.
  • Magic is the only weapon type in Echoes that cannot be forged. That’s a huge disadvantage the other weapon types don’t have.
  • You can’t get a Combat Arte from using a spell a certain number of times like you can with all the other weapons. 
Image result for fire emblem echoes magic


Bows in Echoes got a HUGE upgrade from the original. For starters there are only 4 bows in the original Gaiden. By contrast there are 14 bows in Echoes. Sure, two of them are amiibo and DLC only but that still counts.


One of the problems with bows in both OG Gaiden and in Echoes are their low accuracies. The difference in Echoes is that you can forge a bow, which fixes that problem. Bows have the best range in Echoes and more importantly they give you access to the awesomeness that is the Killer Bow. Not only does the Killer Bow provide you with + 20 Crit but you also get “Hunter’s Volley” which provide two consecutive attacks.

Image result for fire emblem echoes bows


Here’s what Ronaldo said about the worth of swords and lances in Gaiden:


The Devil Sword is the strongest weapon in Gaiden...if you give it to a Dread Fighter. Dread Fighters don’t have to deal with the recoil effect and they’re so fast that they’ll still double attack everything (except for other Dread Fighters) so the extra weight doesn’t hinder them. All while taking advantage of the 13 might of the Devil Sword.

Lances are considered the worst weapon type in Gaiden because they really can’t do anything that other weapon types can’t do better. Bows have excellent range, Swords have the Devil Sword, Magic has the Magic Ring and Miracle Ring. Lances have the Gradivus, but that's endgame only.