Saturday, September 23, 2017
Conquest Map Design Review Part 5 - Chapter 24 - Endgame
Chapter 24
Not going to lie, this map is a lot better designed than I initially gave it credit for. The Dragon Vein gimmick, while totally in your face, works to incentivize mixed teams. Here’s what Fire Emblem Wiki had to say about it:
“If the player activates the Dragon Vein, all ground units (including the enemy) will gain extra movement based on half of their original movement. This means non-promoted fliers get 7 movement (5+2) and promoted non-flying units get 3-4 extra movement (giving them 9 for foot and 12 for cavalry). This is listed as a "Dragon Vein" bonus, so you can still stack more movement such as Boots (note that this will not add to the Dragon Vein, so a promoted cavalry unit would not get 15 movement), units that provide a movement bonus in a Pair Up and Rally Movement. Meanwhile, all flying units will have their movement halved following the same calculations, meaning that promoted fliers will have 4 movement (not including any movement boosts).
- If Hinoka activates the Dragon Vein, the opposite effect occurs (ground units get reduced movement, fliers get extra movement).” (Source: http://fireemblem.wikia.com/wiki/Hinoka_(Chapter))

The map provides a nice amount of Dragon Veins for the player to take advantage of. To its credit Chapter 24’s Dragon Vein is one of the better implemented ones in the game since the benefits are compelling enough to actually be worth using and even planning around.
Chapter 24 also does a phenomenal job of punishing turtling and providing a slew of enemy reinforcements at various locations. Some enemy reinforcements arrive on certain turns while others will show up when the player reaches a certain spot on the map. The mix up works to the chapter’s credit and succeeds at keeping the player moving.

The Kinshi and Falcon Knights are wonderful additions to the map because they can take complete advantage of Hinoka’s Dragon Vein and blick the player's units. On Lunatic Mode the Kinshi Knights have Bowbreaker which makes them harder to deal with since the player cannot shoot them down with bows so easily. Falcon Knights carry Bolt Naginatas which can undermine tanky units since they target resistance. Setsuna has Seal Strength, Pass and Swordbreaker which actually make her formidable to deal with. The addition of Pass means that the player cannot take advantage of her lack of 1 range by blocking her off with 4 different units, Swordbreaker means that the player can’t sick Xander on her and Seal Strength means that dealing with her will make killing enemies afterward a more painful process.
Hinoka is also a fair, but challenging boss. Her first skill is Wing Shield, which means that the player cannot trivialize her with bows. Darting Blow makes her more likely to double attack the player if she’s the one initiating the attack. Sol and Luna make her that much harder to deal with since she can either deal more damage or recover HP. Hinoka is also in a Dual Guard which means that Attack Stance cannot trivialize her and her stats, which are already high to begin with, are boosted even further. It also means that even if the player is able to defeat her they still have to go through her Pair-Up partner which makes seizing that much more difficult. Hinoka will generally have a Bolt Naginata and a Silver Nageyari which means that she can still deal a lot of damage by targeting resistance. It also means that if the player attacks her with ranged weapons she’ll still be able to counter them. That being said, the Bolt Naginata prevents Hinoka from using Sol and Luna (which makes me wonder why she was given those skills if she has access to a weapon that renders them null and useless).
Overall Rating: Excellent
Chapter 25
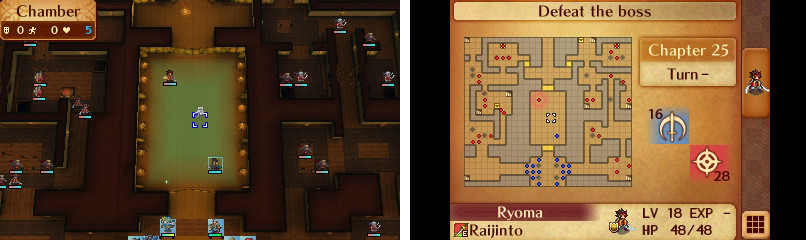
Note to self: 1 v 1 duels don’t mix well with Fire Emblem. They’re either a slog to play through if the player’s unit doesn’t have the stats to compete with whoever they’re dueling, or their stats are too high and the enemy they’re dueling becomes a total joke. Ryoma isn’t even that hard to beat with a right setup. See below for what I did during my Lunatic playthrough as an example:
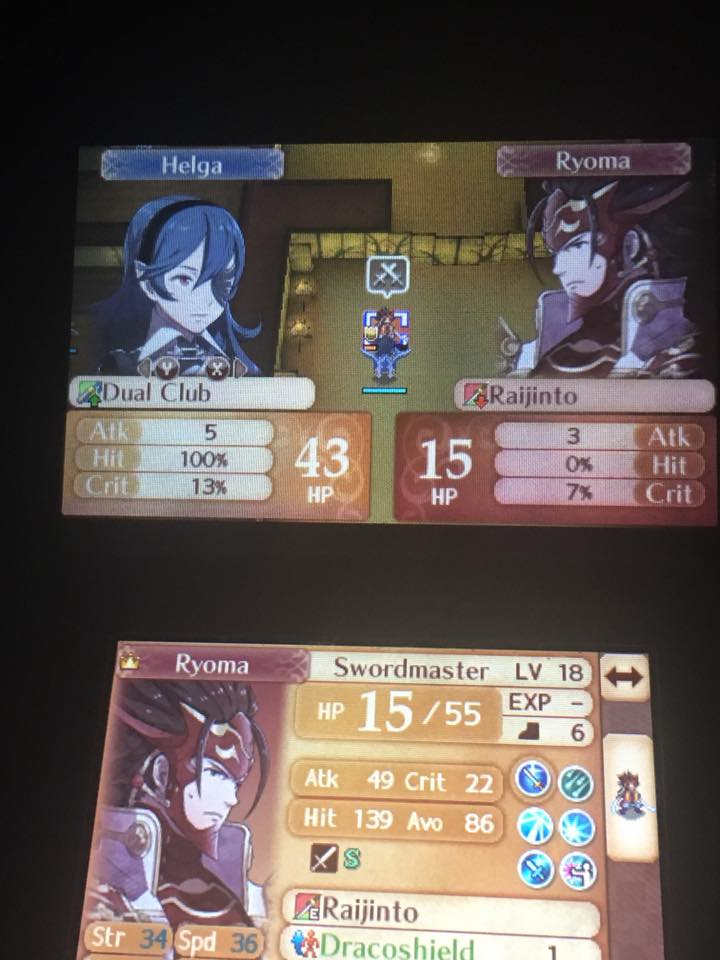
Swordbreaker + Dual Club = LOBSTER BISQUE! (See the video down below for the reference. Studio C is amazing!)
The Lunatic version of this map is just stupid. Inevitable End makes it ugly debut here which means that enemies can debuff any unit into the ground. There’s also one too many Lunge Automata too which make one of the hallway an even bigger pain in the butt. Lunatic Mode will also continue its tradition of randomly handing bosses (like Ryoma and Kagero) Rend Heaven in a cheap attempt to add difficulty. Oh and let’s not forget that Saizo and Kagero now have Inevitable End too.
Just to repeat myself here (because it bears repeating) that ultimately both ninja hallways are pointless since Ryoma can easily be trivialized, which means that the player can totally skip these hallways.
Overall Rating: FAIL!
Chapter 26
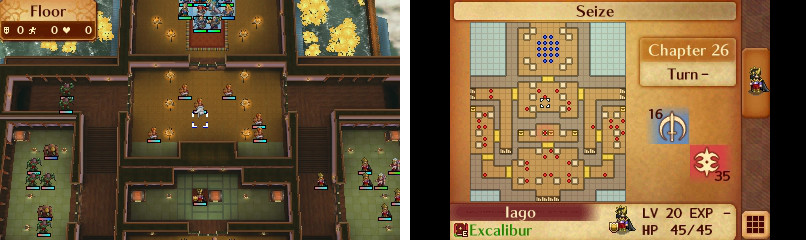
This map gets my vote for “Best Designed Conquest Endgame Map”. Let’s discuss: This map provides two different yet compelling routes toward Iago. The map on the left contains powerful Faceless, some of whom are Stoneborn. The room to the right contains sorcerers and maids. Both of the enemies here are powerful and are a force to be reckoned with. Before getting to either of these rooms the player has to clear out a room full of Hero units who have a wonderful combination of different weaponry and skills. Some Heroes will have Wyrmslayers and Counter which pose a very real threat to the player.
The bottom room is even more intense. Hans on Lunatic Mode is a legitimately dangerous boss. He has Certain Blow, Armored Blow, Death Blow, Counter and Countermagic. The “blow” skills make Hans a force to be reckoned if he ever gets the chance to pull off an attack and the Counter skills mean that the player has to pay meticulous attention to how they go about attacking him. In short, he’s a boss that make the player actually think. Thankfully he can be undermined by the Entrap staff, which will trick the AI and cause the enemy reinforcements to appear then.
The other enemies in the bottom room are also very powerful too. Generals carry Beast Killers and usually have Wary Fighter while Berserkers swing with Hammers. The end result is that the player will be forced to think carefully about what kind of units they’ll be using to deal with these threats since using the wrong type of class can result in a Game Over. There’s also two Generals with Countermagic too, which can throw the player off guard.
Last but not least is Iago. For some strange reason Iago is a Sorcerer that can use staves, even though the Sorcerer class cannot normally use them. Weird. Anyway, Iago is notorious for his ridiculous Staff Savant skill which automatically increases his staff range to 10 and makes his staves unbreakable. One cool thing that he does is that his staff usage is based on the order of his inventory. First he’ll use Freeze, then Enfeeble, then Silence and if the player is playing on Lunatic Mode he’ll be using the Hexing Rod. This makes his pattern predictable, which means that the player can play around it.
Now I want to talk about Staff Savant because it seems like opinions about this are divided. On the one hand I always consider it a sign of bad design to give enemies uber powerful skills that only they have access to. Plus an unbreakable Hexing Rod is bullcrap to the max. On the other hand, somebody pointed this out:
“An infinite hexing rod prevents the player from cheating their way out of it. In some maps, I place a staffbot or pair up unit in the range of the staff and let them get hit with it enough times before the staff's usage runs out. What Iago has prevents that from happening. At the same time it is kind of annoying to be peppered every turn with it, so I'm neutral on it.” (Source: https://www.reddit.com/r/fireemblem/comments/615ev2/fates_map_discussion_thread_42_conquest_chapter_26/)
I lean more toward believing that it’s bullcrap since there’s no real way to deal with it other than either take the hit or turtle out of his range. I would have preferred the game to have tried a different, fairer way of making Iago a threat without having to resort to a bs skill. In spite of this I still find the map to be incredibly well designed.
Overall Rating: Excellent
Chapter 27

This map has issues. For starters there’s the infinite range Entrap maids that will send different units to different rooms. I found some interesting tidbits about them on FE Wiki:
“The trick to manipulating the AI of the Shrine Maiden is to learn 3 facts:
“The trick to manipulating the AI of the Shrine Maiden is to learn 3 facts:
- They will Entrap your highest total stats available unit one by one. The distribution of which ally units entering which rooms will be based on which ally units function the worst against the enemy in said room (weapon triangle advantage, etc.).
- They will not Entrap units in rooms.
- They will not Entrap units in enemy range.” (Source: http://fireemblem.wikia.com/wiki/The_Empty_King_
The Awkward Stair gimmick returns for the last time. I actually find the stair gimmick to make the map significantly easier because if you get the right pair-up in the right spot then the end result is that the player can reach Garon sooner. The group guarding Garon is pretty strong with their mix up of Counters and Spendthrift. Unfortunately this group can be baited out which makes approaching Garon that much easier. Garon can be trivialized if the player fights him with a unit who has Axebreaker. If the player doesn’t have access to Axebreaker Garon can still be reasonably dealt with. He doesn’t have bs skills nor ridiculous avoid to deal with. While the map does provide enemy reinforcements that show up behind the player the chances are high that the player will be long gone before these reinforcements even show up. It also doesn’t help that the player HAS to playthrough this map every time they get a game over on the final chapter.
Overall Rating: Below Average
Endgame

Just going to come out and say it: This map is BULLCRAP! Especially the Lunatic version. Maids start out with Enfeeble and Hexing Rods, which isn’t anything the player hasn’t seen before, but when said maids are given Staff Savant and Inevitable End it makes conventional combat nigh impossible. The only real way to deal with these maids is with Pass and Rescue. When a game like this actively forces a very narrow way of beating it and punishes alternative methods it’s not just unfun, it’s bad design.
I’m not sure if the map’s trying to punish turtling or incentivize it. It throws hoards of enemies at the player from all sides but then dishes out a map wide attack reminiscent of what Ashera used to do in Radiant Dawn. Sure the player can avoid the map attack, but said map attack requires the player to play slower and hide behind something in order to not get hit. If the player takes too long they’ll be overwhelmed by enemy reinforcements, but if they rush ahead the map will destroy them.
Another massive problem is that the player is prevented from saving between the previous chapter and this one so risky strategies are even further discouraged. To its credit giving Takumi a skill that essentially lets him have the Awakening version of Pair Up is a smart move because it actually makes him threatening. Conquest might be the only game in the series where a sniper boss is actually threatening. Before I forget, I also find the enemy density to be a bit much for a map like this.
Overall Rating: FAIL!
Conquest Map Design Tally
Excellent: 6
Pretty Good: 4
Decent: 2
Meh: 5
Below Average: 3
Fail: 10
12 / 30 maps were decently designed or better.
Conquest’s Official Map Design Score: 40 %
__________________________________
In case you’re wondering what Conquest’s map design score would be without the shared chapters here’s what it would be:
Excellent: 6
Pretty Good: 3
Decent: 1
Meh: 5
Below Average: 2
Fail: 7
10 / 24 maps would be decently designed or better making that score 42 %.
______________________________________________
Final Thoughts: Conquest’s map design is overrated. A lot of maps rely on dumb gimmicks to be special, a good chunk of them can be trivialized effortlessly and it makes the same mistake Awakening made in that it resorts to cheap methods (like giving enemies OP skills) in order to artificially ramp up its difficulty.
To be fair, it does have the best map design of all the 3DS games but this has less to do with Conquest’s merits and more to do with how abysmal the map design of those other games are. I’ll even throw Conquest a bone and say that its map design is better than Holy War, Gaiden and the Tellius games. That being said, there are Fire Emblem games whose map designs are definitively better than Conquest’s (including, but not limited to, Thracia 776 and Mystery of the Emblem) and other games that one could argue have better map design than Conquest (like Blazing Sword and Shadow Dragon).
In short, Conquest is not the shining pillar of map design that most people make it out to be and it should not be treated as such.
Thursday, September 21, 2017
Conquest Map Design Review Part 4: Chapters 18 - 23
Chapter 18
Not going to lie, I actually like this level. For starters there are two routes to approach the chapter from and it seems like there’s a pretty decent incentive for the player to go both routes and split their army up. The map also features a decent variety of different enemy unit types. There are cavalry (both Paladins and Bow Knights), Heroes, status staff maids, armor knights and sorcerers. That’s enough variety to require the player to switch things up a little bit. The player has to deal with 3 bosses who are on different sides of the room. Two enemy generals are paired up and they both have Wary Fighter, which makes them even more difficult to deal with (although effective weaponry exists).
There are a couple of nitpicks that I have. The turn limit is a bit generous, Zola isn’t all that strong and the treasure chests are never contested. I am willing to cut some slack for this map when it comes to the turn limit though. This map is supposed to be a breather before plunging into the nightmare of the next few chapters. At least this map tried to get the player to play somewhat faster, which is more than what I can say for Chapter 11.
Overall Rating: Pretty Good

Chapter 19
Oh great. The infamous furry genocide chapter. Reviewing this should be fun (in case it’s not obvious I’m being sarcastic). This map has several issues that completely undermine it:
- Homogeneous Enemy Unit Type: As you may have noticed in my Chapter 18 review and in a couple of other map reviews I mention diversity of enemy unit types as a good thing. Want to know why I bring that up? Because 1 - 2 enemy unit types generally makes the map significantly easier.
Every Fire Emblem game has weapons that deal effective damage against certain types of units so if a whole map consists of an enemy type that has a weapon that can deal effective damage against it that weapon now has the power to break the map. Here it’s the Beast Killer. By having a map where every unit is weak to the Beast Killer the map gives the player an easy “out” to beating it.
2. The Illusion Gimmick: Another massive problem with this map comes in the form of the illusion gimmick. For some weird reason the kitsune gain the ability to avoid being attacked at random times in the map. This gimmick has no strategic value whatsoever and serves no other purpose than to drag out the pacing of the map. It discourages Player Phase action and there’s nothing the player can do about said gimmick.
3. The Kitsune Stats: Another problem with this map is that the kitsune are at that awkward point where they’re strong enough to curbstomp the player’s weaker units but not strong enough to threaten the player’s best units. This incentivizes low-manning, which is contradictory to what the Fates philosophy is supposed to be. To go along with this comes from the fact that every kitsune on the map has ridiculous avoid which means that the player will have shaky hit rates all chapter long. While the kitsune brutally punish mounted units they don’t do so well at punishing fliers, making this map extra vulnerable to wyvern riders.
So here’s a simple formula for trivializing this map
- General / Wyvern Lord + Beast Killer = Broken map
Number of Conquest Bosses With Ridiculous Avoid: 4 + An Army of Furries
Overall Rating: FAIL!

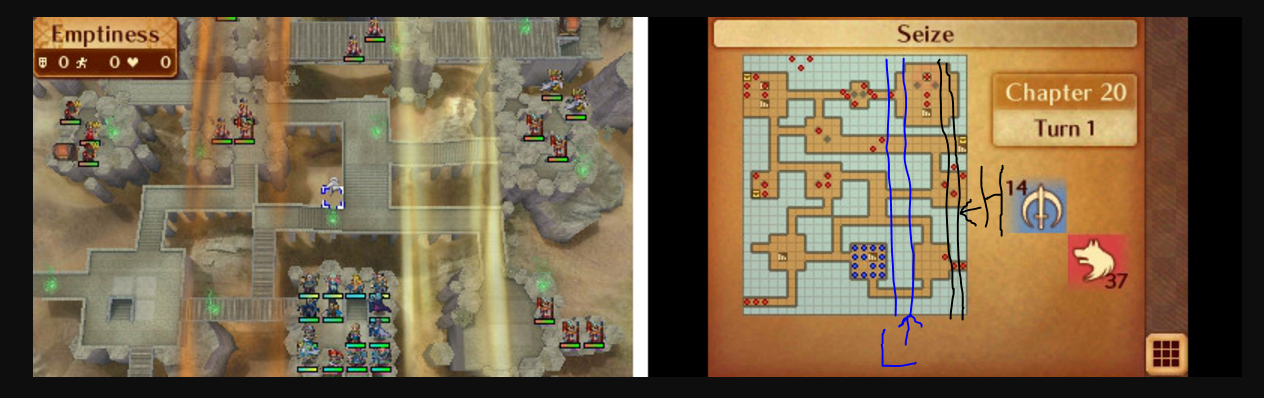
Chapter 20

Another infamous Conquest map: Mr. Fuga’s Wild Ride. This map has a major problem that undermines it: The Wind Gimmick. All the player has to do is park their army in the wind column that will get them closest to the boss (it changes based on which mode is being played. I made a snippet that should give the player a rough idea of what I’m talking about), let said wind column carry their army to the top of the map, bop Mr. Fuga and seize. I’ve tried this strategy on both Hard and Lunatic Mode and it works equally well in both versions. This map can be beaten while the majority of the enemies can be easily ignored. Also, the Dragon Vein is pretty unnecessary. Also is it just me or is Mr. Fuga’s avoid a bit too high in this map?
Number of Conquest Bosses With Ridiculous Avoid: 5 + An Army of Furries
Overall Rating: FAIL!
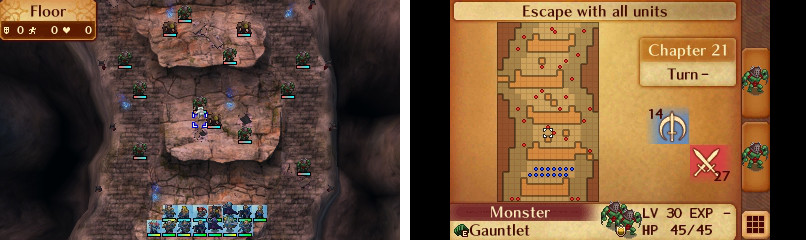
Chapter 21
“Pair Corrin with Camilla. Fly up for three turns. End.” (Quote Source: https://www.reddit.com/r/fireemblem/comments/68iuaj/fates_map_discussion_thread_53_conquest_chapter_21/)
Yeah, when flying in a straight freaking line is an efficient way to deal with a map you know you dun goofed.
Overall Rating: FAIL!
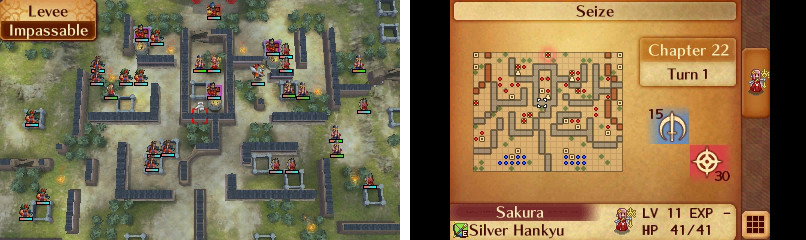
Chapter 22
Alright an actually well designed map in this part of Conquest! I didn’t know those existed. This map gives the player two methods of meaningful approach. This is undermined by the player’s ability to pair everyone up and go one route, but the player still has to pick a route, which counts for something. The map does a very good job at implementing its turtle disincentives providing multiple sets of powerful enemy reinforcements that succeed at pressuring the player to play faster. FE Wiki did a great job breaking this down.
This map also throws debuff ballista at the player and even has Sakura using status staves. These are effective at requiring the player to think carefully about their positioning. Hana and Yukimura have ridiculous avoid, which is a negative. Hana even gets Rend Heaven on Lunatic Mode and a very high chance of activating it too (during my run she activated Rend Heaven every time I fought her. It felt so good for Xander to Luna crit her face off) which makes fighting her even more RNG dependent.
Overall Rating: Pretty Good
Chapter 23
The map that spawned so many memes. What is up with our current fascination with walls? Ahem, anyway, Chapter 23 is one of those maps that looks impressive until you realize that it has a few massive flaws that can severely undermine it.
- Flier-Skip / Para Drop: The bottom portion of Chapter 23 contains a chasm between the wall and the player’s starting position. All the player has to do is Pair-Up their fliers with other units in their army, fly north toward the ballista and “drop” the Pair-Up partners on the other side.

You’d think that the ballista would punish this approach but since ballista don’t kill there’s significantly less harm in this approach. Sure the map still has snipers, but they aren’t present for the part of the map where a flier can paradrop other units. This approach also lets the player ignore a good chunk of enemies to fight without it having any impact on the player’s ability to complete the map. See the green part of the picture below. That represents all the enemies you can ignore and still beat the map in.

2. Severe Lack of A Turtle Disincentive: Another massive flaw in Chapter 23’s design is that it is so easy to fight a few enemies on top of the staircase, go back down the stairs, heal and repeat the entire process. Since the enemies never go down the stairs the player is completely free to play at whatever slow pace they want and this map will not penalize them for that. The end result is that this map becomes easier to cheese without much effort or thought on the part of the player.
The only other problem with this map is that the Lunatic version continues its tradition of randomly giving powerful enemies Rend Heaven (in this case Takumi). This feels like a cheap way to make said enemies stronger because Rend Heaven is an RNG centric skill meaning that the fight against Takumi is RNG reliant. To be fair he already had Vengeance, but then again my issues with Takumi having Vengeance are pretty much the same ones as giving him Rend Heaven.
Overall Rating: FAIL!
Wrap-Up Thoughts: This section of Conquest isn’t just bad, it’s legendary in how bad it is. This is the part of the game where the gimmicks come out in full force and it seriously makes playing Conquest a pain in the butt. These gimmicks do not add to the strategy, in fact they make the game less strategic, not more. What’s worse is that most of them have incredibly easy ways to get trivialized which makes their design even sillier by comparison. Maps like these are a reminder of why I do not Conquest one little bit.
Sunday, September 17, 2017
Conquest Map Design Review Part 3: Chapters 12 - 17
Chapter 12
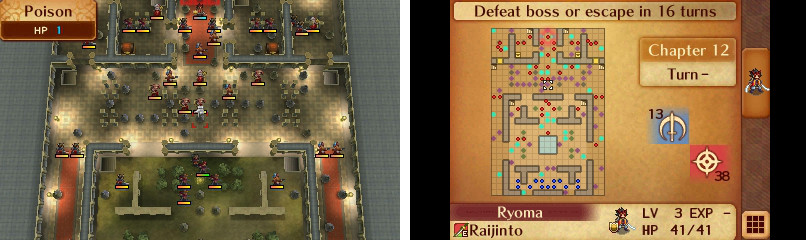
There are three different routes to approaching this map. There’s the middle route through the courtyard and the routes that are off to the side. This map’s turtle disincentive comes from the map objective itself. 16 turns is enough to get the player moving. Some players might find that generous but at the very least it’s there to get the player moving and it ensures that the player doesn’t take all day, which is more than what other maps have going for them.
The ninjas in the courtyard are challenging enemies, especially Saizo and Kagero’s Dual Guard. Saizo uses a Flame Shuriken and Kagero uses the Sting Shuriken in addition to a Steel Shuriken in Hard and Lunatic mode, which can shred armored units to pieces. The chapter also employs Shrine Maidens which use Silence, Entrap and Freeze. All three of these can pose a threat to the player and encourage careful positioning. The archers behind the pots above the courtyard serve a similar purpose. Ryoma is also a really challenging boss, but is fair and unlike Chapter 6 fighting him here isn’t as RNG reliant. Plus you don’t even have to fight him either. The Dragon Vein in the map is interesting and provides a series of strategic trade offs. Do you break the pots and make a mad dash toward the boss or not? I would have preferred it if the Dragon Veins instead let the player pick and choose which pots they’d be allowed to break, but this version works as is.

Then there are the pots. There are too many effects. Unless you read a guide, breaking them is a shot in the dark. This is a case where less would have been more. Just have one effect for all pots that are supposed to have a negative effect, and one effect for pots that are supposed to have a positive effect. Another problem is that breaking pots can either hurt you if you’re breaking a negative pot or help your enemies if you break a positive effect pot so it can seem a bit tedious to deal with. Like I mentioned before this is a nitpick because breaking the pots is not necessary for beating the chapter. Overall, this is map is very well designed.
Overall Rating: Excellent
Chapter 13
This map is alright. It gives you two different directions you could go in. You could either attack Takumi’s group or attack Orochi’s group. The player also has to deal with Wyvern Knights that are paired up with Armor Knights. The map makes good use of Reina’s high movement and attack range, which works as a means of getting the player to focus on their positioning. It should also be noted that two cavaliers on Reina’s side have Beast Killers, which could cause trouble for the player that doesn’t pay attention.
The map tries to threaten the houses with the outlaw, but the execution is a bit off since it takes a while before they’re ever in any real danger. Then there’s Scarlet. Her crit rate can be pretty high especially when you take her personal skill into consideration and on Lunatic Mode she even has a Killer Axe. She also has Death Blow too. Fighting Scarlet can also results in enemy reinforcement spawns which can feel pretty cheap since they’re powerful and can kill one of your units if you didn’t see them coming.
Overall Rating: Decent
Chapter 14
Chapter 14 is an example of a map that looks good on paper but can be undermined by a few powerful wyverns. All the player really has to do is fly toward the top of the map, kill the archers and enemies near the top and then proceed to fly over toward Kumagera and kill him. To its credit there’s at least the side objective of rescuing Keaton and treasure chests so there are valid reasons to play the chapter normally. 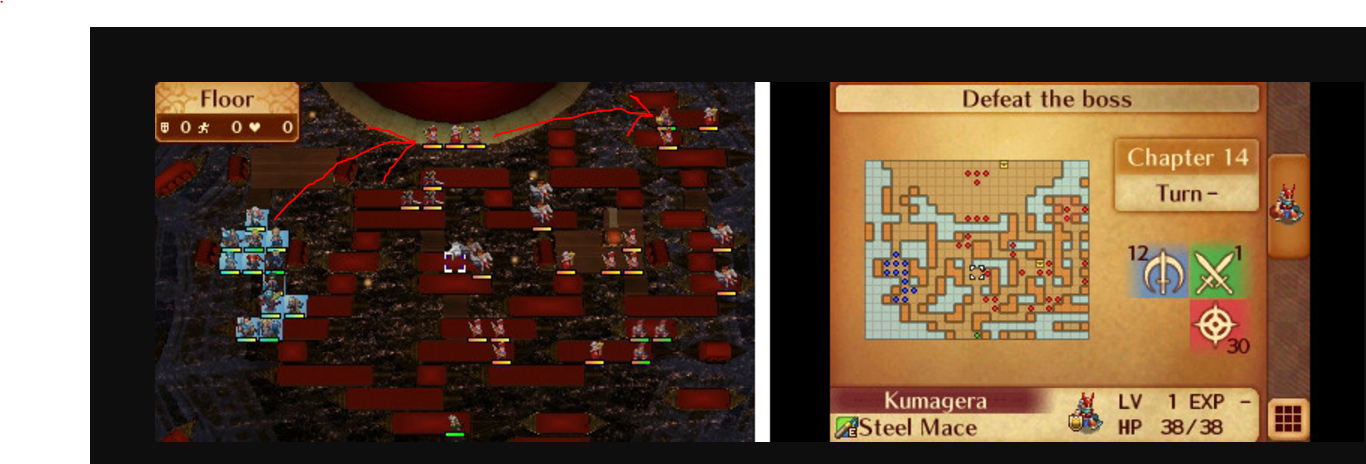
Overall Rating: Meh
Chapter 15
Eh, this map has issues. Before we get to those let’s talk about the Dragon Vein. Here the Dragon Vein gimmick adds a new dimension to the map. It provides a second option to approach it and potentially get a Speedwing. The Speedwing is a valuable item so chances are high that the player will actually try to get it, even if it means dealing with a powerful boss. Unfortunately the Dragon Vein is all the map has going for it.
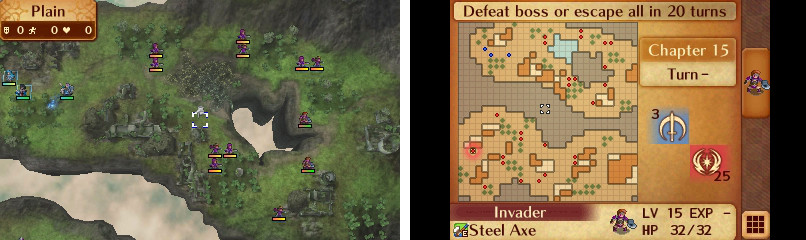
The boss is the only enemy that’s actually challenging or memorable to fight and the turn limit is generous to the point where it ceases to be an effective turtle disincentive. Replicate Azura cannot dance, which makes me wonder why the designers even bothered to make a replicate Azura. This chapter is way easier if Corrin is sufficiently trained and having only 3 units limits the player's options. Also, if the player chooses not to use the Dragon Vein gimmick then the map gets that much easier. Also, is it just me or does fighting the Hero boss come across as a little too RNG reliant?
Number of Conquest Bosses With Ridiculous Avoid: 3
Overall Rating: Below Average
Chapter 16
This map is awesome! The gold count is easily one of the most creative turtle disincentives in the series and it succeeds at getting the player to play faster without being punishing. The NPC boss kill idea is effective at forcing the player to move in different directions. There’s a lot of overlapping enemy unit ranges which means that the player has to think ahead in order to prevent getting killed. The map features a nice variety of enemy units from Sorcerers to Heroes to Berserkers.

Status staves are used effectively and work to slow the player down, resulting in the player possible getting less money. On the right side of the ship there’s a nice variety in enemy unit weapon inventory. There’s also enough magic and bow users present to prevent flyer skip from happening too. Also, this map provides the most meaningful choice in Fates: Shura or Boots. This is easily one of the best maps in Conquest.
Overall Rating: Excellent
Chapter 17
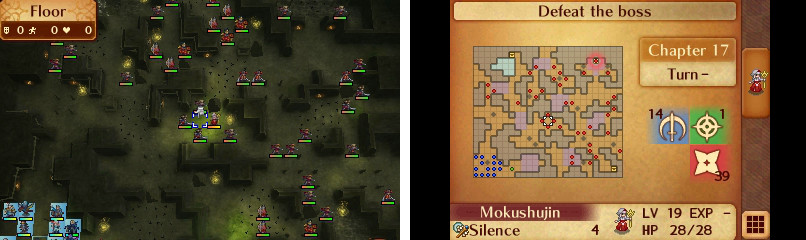
This is the one map I’m not entirely sure about in terms of its quality. It has positives going for it, but it also has negatives as well. The terrain is a good example of this. On the one hand it provides multiple routes to approach the map which is obviously a good thing. On the other hand, it’s also easy to use choke points against the enemy reinforcements this map throws at the player which undermines the power of said enemy reinforcements. Another example of this comes from Saizo. Keeping him alive is an interesting side objective and the reward definitely makes keeping him alive worth it, but he’s also pretty strong. On this map he’s immune to stat debuffs and post battle damage (ie damage inflicted from Grisly Wound and Poison Strike) which is a HUGE boon in a map that spams ninjas.
The Dragon Vein is another example of the hit or miss nature of the map. If used well it can make the map easier. If it’s not used well then it can be tedious. The enemy unit variety is lacking. The enemy unit types are predominantly ninjas, swordmasters and automatons. Most of these enemies are vulnerable to a sufficiently powerful Wyvern Lord like Camilla or Wyvern Lord Corrin. For starters Wyvern Lords have high HP and defense which means that they can tank damage from normal ninja and swordmaster attacks. Another advantage is that they also have weapon triangle advantage against both ninjas and swordmasters (axes beat Hidden Weapons and lances beat swords). Then there’s also Xander who can also counter attack the plethora of shurikens thrown the player’s way.
Last but not least we have Kotaro. I like the caltrops on his part of the map since it requires thinking on the player’s part in terms of how to deal with it and the presence of the other ninja make that aspect more challenging. Regarding Kotaro’s infamous avoid, somebody said it better than me: “Hey, it's FE6 Henning as a Master Ninja. Sword classes on thrones were a mistake, and Master Ninjas are no different” (Source: https://www.reddit.com/r/fireemblem/comments/5ha7nj/fates_map_discussion_thread_20_conquest_chapter_17/#bottom-comments_)
Number of Conquest Bosses With Ridiculous Avoid: 4
Overall Rating: Meh
_______________________________________
Thoughts on the Midgame: This is still a fairly solid part of the game. It’s a slight step down from the earlygame, but it still has enough fun chapters to keep it entertaining.
Subscribe to:
Posts (Atom)