
A while back, someone asked me to rank all the final maps in Fire Emblem. That was roughly a year or more ago. Time flies, and I still hadn't gotten around to it. I apologize for taking so long, but here we go. Before ranking the final maps, I'd like to add a caveat that my memory of some of these games is a bit fuzzy. It's been forever since I've played the following games:
- Fire Emblem 1
- Shadow Dragon
- Birthright
- Revelations
- Awakening
- The Three Houses final maps
The reason why I'm bringing this up is because for these maps I had to rely on the feedback of other people. If your memory of these maps is more recent than mine, feel free to let me know if I got . Now that this is out of the way, I will provide my rationale for the rankings.
Gold Standard Tier: Berwick Saga, Thracia 776, & Fire Emblem 7
I'd like to share two quotes about this map from an ltc player who beat this map in 6 turns: "Without a doubt, this is the most difficult mission in the game, whether playing casually or LTCing. "
"This mission requires extremely precise movement, you'll see that Reese, Volo, Dean, Enid, Lynette, etc. need to maximize their move during the entire mission, making this the tightest map to LTC I have ever done, giving me some FE12 chapter 12 vibe."(Source: https://www.youtube.com/watch?v=j6DYxnEk5C8&t=1674s&ab_channel=Reploids)
Before the analysis begins, I would like to confirm what this player is saying. This is the most difficult map in the game, and it does indeed require precise movement. As far as I'm aware, 6 turns has been the fastest clear of this map, which means that you can't "skip" Berwick Saga's late game. Did I mention that I love Berwick Saga? Because I love Berwick Saga.
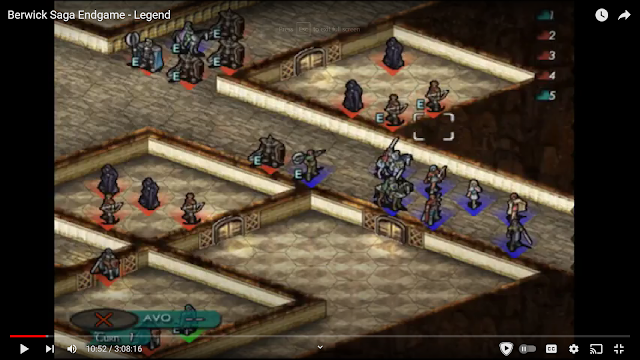
This will probably not come as no surprise to anyone who read my stuff on Berwick Saga, but I really do think this game has the best designed final map in the series. The best way to explain this is that Berwick Saga's final map really does feel like a "final exam" of the game. What's really cool about this final chapter is that it throws together a combination of powerful enemies that the player has had to deal with at least a few times previously in the game.
- Black Riders with spears that deal more damage with each hex traveled: Check.
- Infinite range ballistic siege tomes: Check.
- A dark mage boss with a tome that levels people down? Check.
- Super tanky Armored Knights? Check.
- Multiple dark mages with Berserk and Sleep orbs? Check.
- Powerful archers and crossbowmen with Overwatch that can halt your progress and snipe you? Check.


The next best final chapter in the series is Radiant Dawn's final map. Ashera is a much more interesting final boss to fight than most final bosses in the series. I appreciate how important Nihil is since you need to negate a powerful enemy skill that would otherwise deal quite a bit of damage. Ashera's AoE attacks are a fun way to spice up the map, and her Auroras can either heal her shield or deal damage. There's not much else to say about it, other than this map is very good.

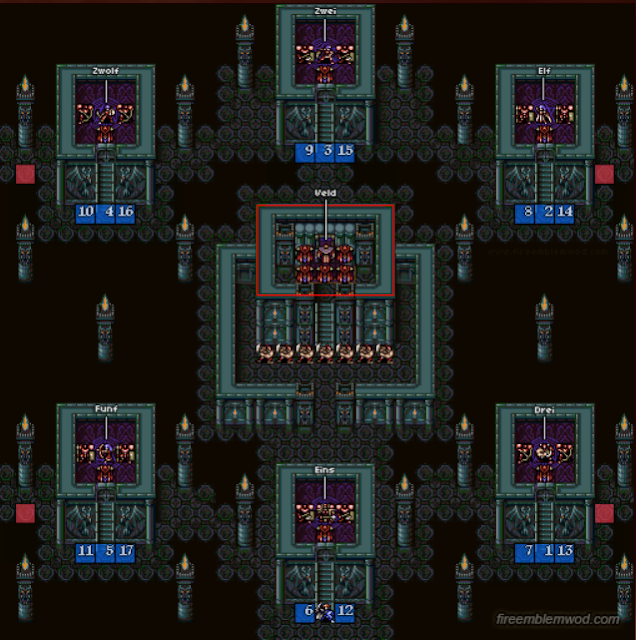
Fire Emblem 1

This one is a map that I'm not super familiar with, so I'm basing this one of off what others have said. It's difficult to talk about maps like these, because the warp skip strategy exists. I don't hold warp skip against a map, since warp is capable of breaking lots of maps. So, for the sake of consistency, I'm not going to hold warp against this map. So, how does it play without the warp staff?
You have to split your army into multiple groups, and then fight through multiple enemies in order to get through to Medeus. It's pretty easy to defeat Medeus, so the real meat is getting to him (assuming that you don't skip the map with the warp staff). According to Fire Emblem WOD, this map manages to throw a lot of enemy reinforcements, and will continue to ramp up the pressure. Credit given where credit is due, that's really good design. One particular issue is that since this is an old school game, it would be bothersome to adjust which character goes where. Yes it is possible, but repositioning units would be a hassle on a map where that's important.
No comments:
Post a Comment