Chapter 1
Chapter 1 of Binding Blade is one of the best designed first chapters in the series. In order to understand why I'm making this distinction we need to talk about how the first chapter of a Fire Emblem game normally works.
Dondon151 brought up an interesting point during his 0 % growths run of Thracia 776:
"So Fire Emblem 5 has one of the most well designed chapters in the entire series in my opinion. Most Chapter 1's treat the player like an idiot..."
Not only do I agree with Dondon here, but I'd like to offer my take on what the issues of many first chapters in the series are. Most first chapters have two major problems:
- Most of them either give you 2 characters to use or less, or if they do give you more characters to use, it's usually a better move to solo that chapter with one of them. This is a pattern that you see in Fire Emblems 7 - 9 & 12 - 15.
This hurts the strategy of the game since there's only so much you can do with 1 - 2 units. It limits your choices and it doesn't make the game as fun to replay.
- The second major problem is that the maps are usually really small. This further limits where the player can go and what they can do. As a result, these two factors rob the first chapter of any strategy they might have had.
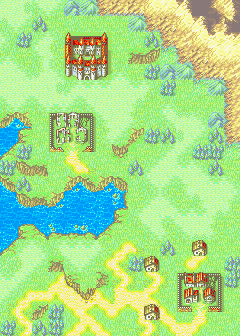
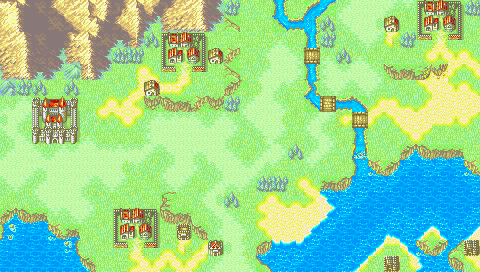
Binding Blade's first chapter doesn't have those issues. You're given 6 characters to use right off the bat instead of 2. The map is also significantly bigger, which means that there's more room to move around.
This chapter also does something really cool: It threatens the house to the player's right with a brigand. This little design choice incentivizes the player to play faster. Turtle disincentives NEVER appear in the first chapter of a Fire Emblem title. So for Fire Emblem 6 to come along and do this really makes it stand out from the rest.
If you play this game on Hard Mode (which is what I'm doing and the map design reviews will be based on this game being played on Hard Mode) then the enemies are actually pretty powerful, which means that you have to be careful about where you place your characters.
First Chapter Ranking: Pretty Good.
________________________________________________
Chapters 2 & 3
I'm gonna group Chapters 2 & 3 together because they both have the same rank and suffer from the same issues.
Chapters 2 & 3 Rank: Meh
The first problem with both maps is that they encourage the player to turtle. This problem is especially true of Chapter 2 where there are two different choke-points on the map. This screams "park a powerful unit here and let them kill everything". It's the opposite of what you want a good map to do, is which get the player to play faster. Chapter 3 incentivizes turtling in a more subtle way by having the enemies start out so close to the player and then having the enemies aggressively charge the player.
Another problem these two maps share is that they both place the various houses where you can get items and recruit Lugh in weird spots. None of the houses are threatened so you have all the time in the world to get them, and both chapters also have a house that's positioned behind the player, which requires said player to get a horseback unit to ride behind and get that item.
Chapter 3 tries to disincentivize turtling with its enemy reinforcement placing near the boss, but even that just winds up encouraging turtling since those enemies are placed directly in front of the player, and there's an easy choke-point on that part of the map that makes defeating those enemies easy.
________________________________________________
Chapter 4
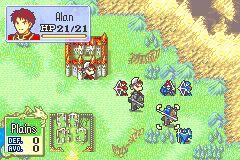
Chapter 4 feels like a major step up from the previous two chapters in a couple of ways. For one thing, the village to the south is further away from the player, and actually gets threatened by pirates so the player has to hurry up in order to gain that treasure.
Then the game provides a further turtle disincentive by having pirates start spawning en masse and then having cavaliers show up behind the player and start attacking the player.
Then there's Rutger. I have mixed feelings about the way this chapter handles Rutger's inclusion. It's cool that a powerful enemy-turned-ally can actually cause the player to be cautious since you don't want to kill him, but you also don't want to be killed by him. Rutger's presence on the map provides a puzzle for the player to solve. Plus the fact that Rutger can only be recruited by Clarine means that you have to be mindful about where she is in relation to him, and you have to have Roy at the right spot in order to recruit Clarine.
On the other hand, his presence is hidden from the player, and unless you already know how far he can move it's very likely that Rutger can possibly crit you and cause a restart. I imagine that it's moments like this where Binding Blade's same turn enemy spawns piss people off. For what it's worth, I think you could have had all the same tactical benefits by simply having Rutger on the map without having to make his inclusion a surprise. So overall, I consider it a mixed bag. That being said, it does add to the strategy of the level, it just could have been done better.
Chapter 4 Ranking: Pretty Good
________________________________________________
Chapter 5
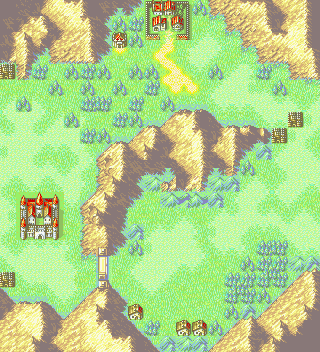
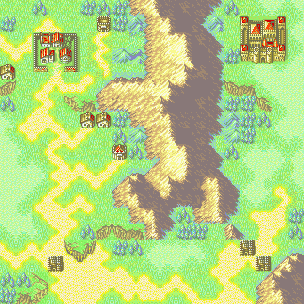
By far my least favorite early Binding Blade map. This chapter always feels like a slog to play through whenever I'm trying to get through it.
The only good thing I can say about this map is that it at least gives you two ways to approach it. You can take the long way around or you can move to the gate on your left and try to fight the enemies there.
Either way, you still have a massive glob of enemies sitting near the castle, and it's unlikely that you're going to be able to get around them. The village to the north doesn't usually get threatened (at least, I'm able to beat this map before the brigands show up) so there's plenty of time to get it before beating the map.
Chapter 5 Ranking: Below Average
________________________________________________
Chapter 6
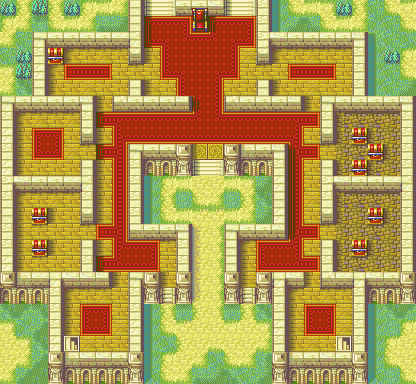
This is an example of a map that I always look forward to playing, and here's why:
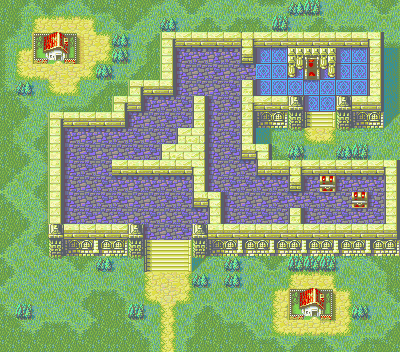
This game gives you three routes to approach the throne, and gives you valid reasons to take those routes. Getting attacked from three different sides helps, but there's also the fact that there are both treasures and Sue (who some would argue is a treasure) that you can acquire.
But wait, the treasures are actually threatened by Cath, a character that looks recruitable. Cath's presence makes the player have to think about where they want Roy to be so he can talk to her. The thing here is that even after Roy's finished talking to Cath, she'll still try to take the treasure, so you still have to deal with her (I recommend using Chad who will live up to his namesake by stealing one of her lock picks, which is pretty funny).
In addition to all these treasures and having to deal with Cath, this map does actually throw enemy reinforcements at you which means that you'll have to play faster. The first wave of enemies near the throne slow you down and give the enemy reinforcements behind you time to catch up. So in short, Chapter 6 is a textbook example of what a well designed map should look like.
Chapter 6 Ranking: Excellent
________________________________________________
Chapter 7

Binding Blade Chapter 7 is one of my favorite maps to play in the series. I've fan gushed about this chapter before, but the more I get a chance to gush about this map, the better.
So this map starts by immediately putting pressure on the player in the form of having Zealot and Treck appear far away from the player in the midst of a group of enemies. Zealot may be powerful, but he's not invincible and if you don't get to him quickly he's going to die. Zealot is like a second Marcus, so you definitely want to save him. Treck and Noah are also worthwhile additions to the army so you'll want to blitzkrieg over in their general direction.

But wait, this map will still throw another turtle disincentive at you. Even after you manage to clear out all the powerful enemies, this map will provide not one, but two waves of enemy reinforcements that will charge you. Just like Chapter 6 there will be one group of enemies near the throne and another group of enemies that will attack you from behind. And just like in Chapter 6 this powerful combo is effective at putting pressure on the player to play faster and rush to the throne.
As if that weren't enough, you also get numerous houses and treasure spread throughout the map that can give you access to a wide variety of amazing goodies. We're talking about getting another Killing Edge, a Physic, a Red Gem and a Hero Crest. All of those items are amazing and are totally worth getting.
The enemies in this map are also great. This map is the debut of the Wyvern Riders, which are powerful, tanky enemies that dish out lots of damage, can take the hits and have high movement to boot. These things are scary. As if that weren't enough, a lot of enemies on this map tend to pack 1 - 2 range weapons which makes them an even bigger threat. The combination of Cavaliers and Armor Knights means that dishing out damage is harder than usual since these are bulky enemies. Combine them with the Wyvern Riders and you've got a powerful combination of enemies that can pose an actual threat to the player. In the end, this makes Chapter 7 the personification of "tough but fair while also being very rewarding to play".
Chapter 7 Map Ranking: Excellent
_____________________________________
Chapter 8
Chapter 8....is fine. The map's biggest saving grace is that it effectively uses enemy reinforcements to push the player toward the throne once the throne is within reach. Seriously, it seems like there are more enemies charging at the player from behind, then from the front.
Another clever trick this map throws at you is that it gives an Armor Knight at the front of the level a Horseslayer. This is a brilliant move because this map is huge and incentivizes the player to rescue chain with their mounted units. Putting a Horseslayer near the front makes it easy for the player to not pay attention and be met by a crazy surprise as their favorite mounted unit is met with a 1 Hit KO.

Cath shows up again trying to threaten your treasure. Once again she serves as the game's way of saying "Get to the treasure fast scrub." This chapter also gives an Armor Knight a Killer Lance later on, which is another great example of forcing the player to pay attention to the enemy inventory.
Unfortunately there are a couple of problems with this map. The beginning portion is kind of boring, as it's a really long hall that just screams "use your mounted and flying units to rescue your infantry."
The other problem with this map is that tries to do something clever with Lilina by placing an archer next to her. The problem with this approach is that there's always an empty square where Lilina can run to and once the player gets to a certain spot on the map, the enemy archer just ditches Lilina anyway. It's not terrible, or even bad, it's just a missed opportunity to put additional pressure on the player.
Chapter 8 Ranking: Decent
___________________________________________________
Map Design Totals So Far
Excellent: 2
Pretty Good: 2
Decent: 1
Meh: 2
Below Average: 1
Fail: 0
This is a pretty solid start for the game. Over half of the early game maps are fun to play. This game really knows how to put pressure on the player, which makes the maps exciting to play as. Plus, these maps know how to balance out between enemy quantity and enemy quality. The early maps give you a good idea on what to expect for the rest of the game, and I have to say that it's a promising start.
No comments:
Post a Comment