Friday, July 17, 2020

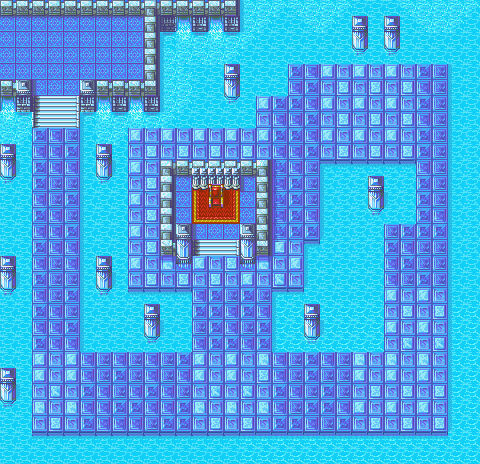
Binding Blade Map Design Review Chapters 14x - 20 (Sacae Route)

Chapter 14x


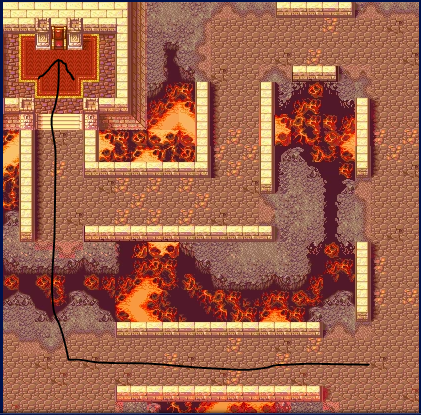
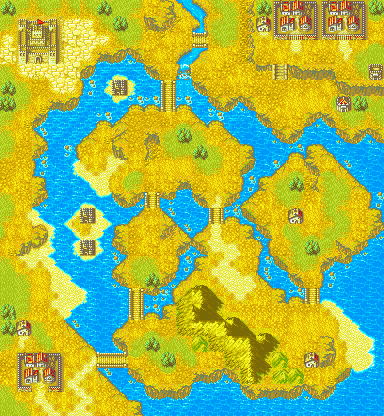
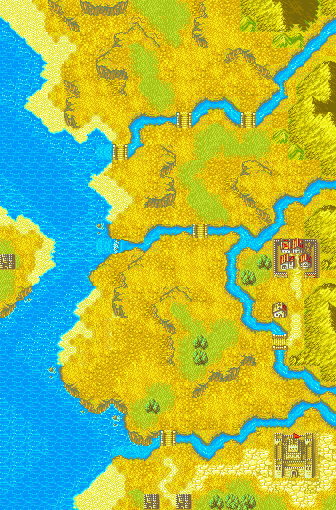
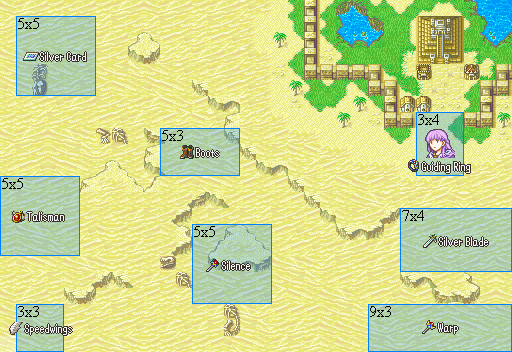
Chapter 14x, aka "the Warpskip Gaiden". This is a map that I traditionally have used Warp on. Even Fire Emblem Wiki tells you to Warp Skip this map:

"If you have a magic users with high Magic and an A/S rank in staves, using the Warp staff given to you in the last chapter, it is possible to one turn this map by warping one unit and Roy into the throne room and have the other unit (or if you warped Lalum or Elphin, use Roy) to kill the boss, then have Roy seize the throne. If you are using one magic user, use Lalum/Elphin to dance for the magic user." 
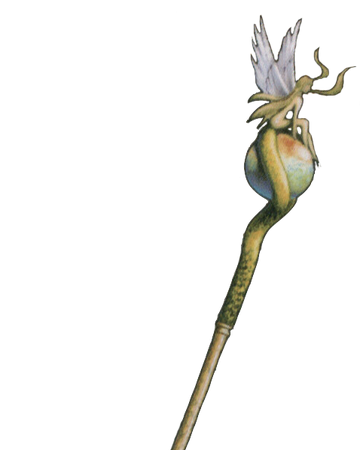

Warp | Fire Emblem Wiki | Fandom

I don't give maps a lower rank because of Warp. The Warp staff is so broken that it can break a lot of maps across the series. I didn't hold Warp Skip against Thracia 776 back when I did my Map Design Analysis for that game, so I'm not going to take Warpskip into account for this map.

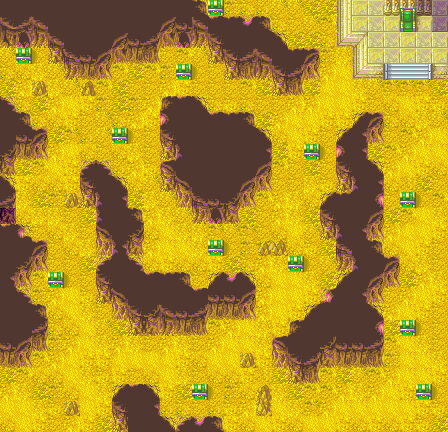
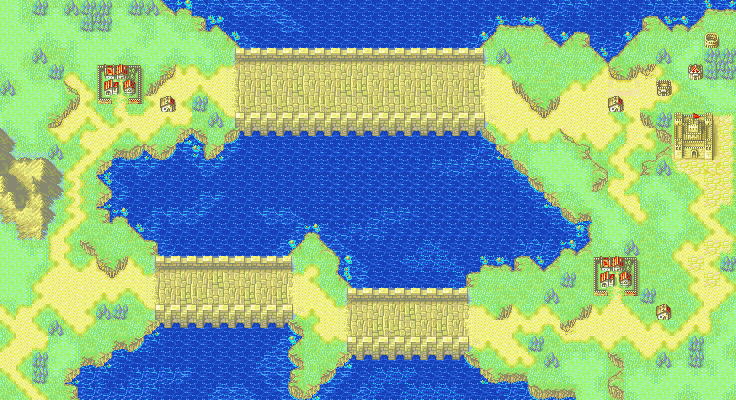
I decided to play this map without Warp Skipping just to see what it was like. I am never making that mistake again. Chapter 14x is more fun to play when you skip the map than when you actually attempt it in a normal way, which is really sad. The water gimmick is not fun since all it does is make anyone who isn't a flier incapable of moving. This is even worse than the desert gimmick! This map has no turtle disincentives, and there are enemies in the distant corners that don't do anything. You can essentially beat this map without Warp and still not interact with a decent chunk of the enemies. I fail to see any redeeming qualities to this map, which means that Chapter 14x gets the ranking of:

Chapter 14x Ranking: Fail!

____________________________________________

Chapter 15
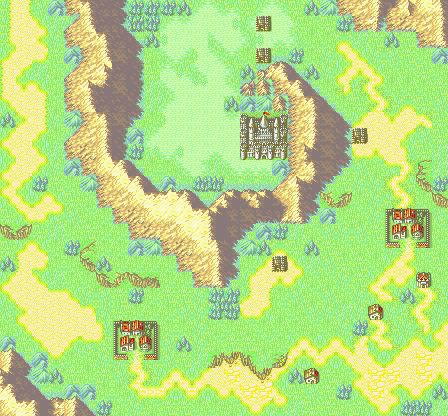
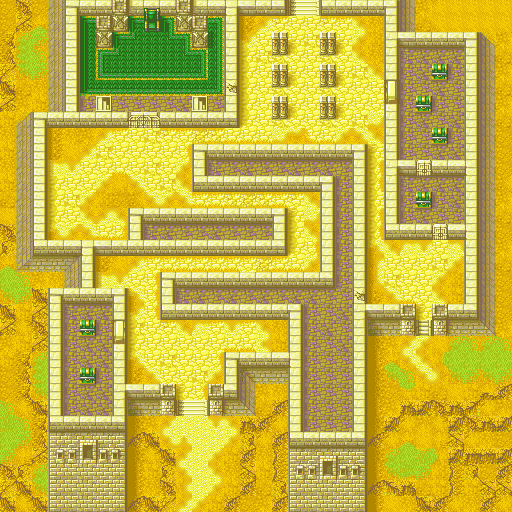
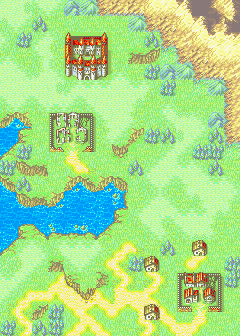
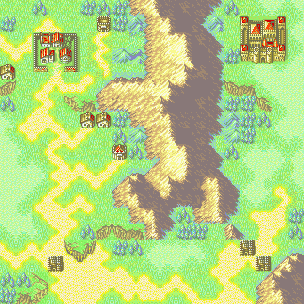
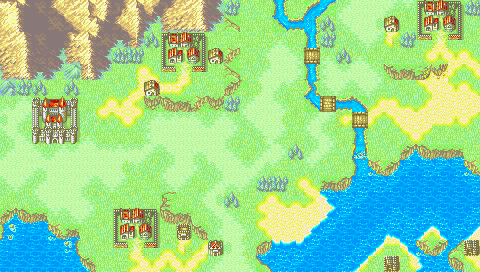
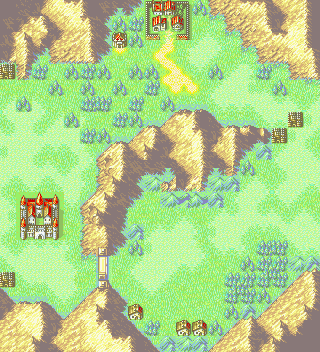
This map kind of reminds me of Chapter 5 in the sense that there's a lengthy mountain range between the player and the boss. There's also a route that the player would otherwise have to move around that can feel like a bit of a slog to play through. 

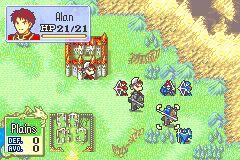
This map tries to get the player to play faster by having a Brigand threaten the village to the right, but the village is pretty close to the player, and since the enemies on this map aren't that challenging it isn't difficult to get to said village. Perceval's recruitment isn't anything special and doesn't add much to the map. 

Once the village is rescued there's not much to do except either move around the mountain or have a flier swoop in to kill the boss. Overall, this is a pretty boring chapter.

Chapter 15 Ranking: Below Average.

____________________________________________

Chapter 16
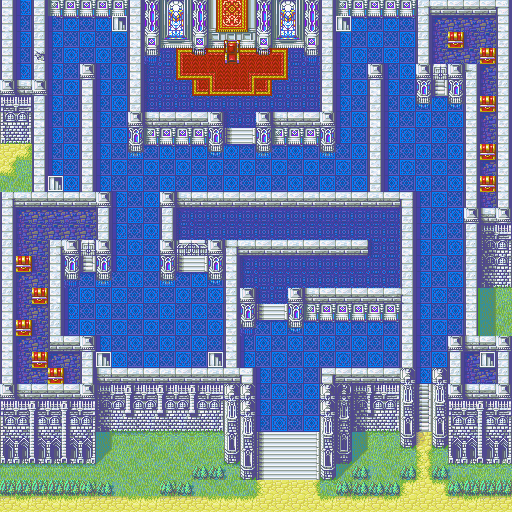

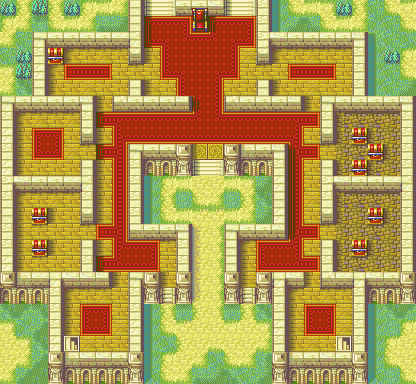
This map is actually good. For starters, it gives the player two routes to approach the map with, and you have an actual reason to split your army up and head in both directions. On the right, you have Hugh's recruitment, plus treasure. On the left you have Zeiss in the upper left hand corner and treasure. 

In order to get the next Gaiden chapter you need to keep Douglas alive. This sounds like a neat puzzle on paper, but in practice it can be easily solved with a Sleep staff. It also has enemy reinforcements that approach the player from behind. The only problem is that you can prevent these reinforcements from appearing by having a character move on these tiles. So the turtle disincentive can be easily undermined.

Overall, it's a fine map. It could have been better, but it works.

Chapter 16 Ranking: Decent

____________________________________________

Chapter 16x
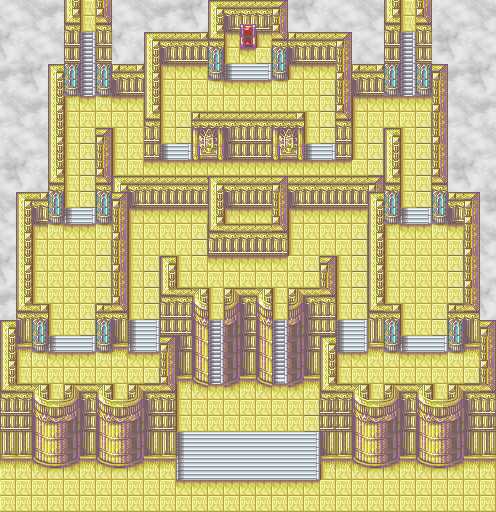

I'm trying to think of something positive to say. Umm...I like the siege tomes and status staves that enemies throw at you. I guess you can say that there are two main methods of approaching enemies. 

Yeah I got nothing. The only interesting aspect of this map are the ballistic siege tomes and status staves. Outside of that, it's a pretty bland map that has nothing new or interesting to offer.

Chapter 16x Ranking: Below Average

____________________________________________

Chapter 17 (Sacae Route)
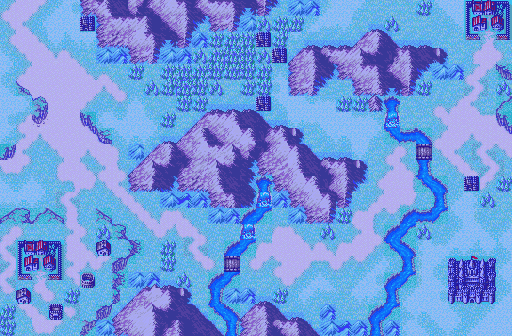

This map...is okay? The most interesting part of this map is the village in the top right. Even though this is a Fog of War map, you can potentially still find out that there are thieves who will presumably go after said village. So, I guess there's still a turtle disincentive. Plus there are enemies who will show up from behind the player, so I guess that counts? Again, there's not much to this map since the path to the throne is fairly straightforward for a Fog of War map. Trying to get to the village is the most interesting part, but it isn't that difficult to get to.

Chapter 17 (Sacae Route): Meh

____________________________________________
Chapter 18


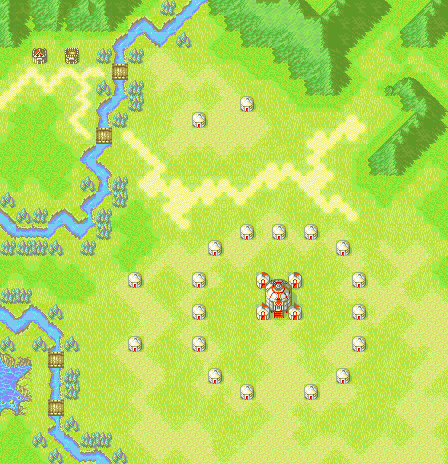
Yeah, I'm not a fan of this map. It's basically an open field with a bunch of enemy spawn points near the throne. I get the idea behind this: You want the player to play fast so that there's less time for enemies to show up. However, the enemy reinforcements show up too close to the player in a game where same turn reinforcements exist. So basically it's really easy for an enemy to show up right next to the player and for that enemy to cause a Game Over. When people complain about same turn enemy reinforcements, they're probably thinking about this map. Outside of the spawn points, this map kind of feels like the map I'd see on Awakening or Gaiden / Echoes due to the open plain nature of the game.

Chapter 18 Ranking: Fail

____________________________________________

Chapter 19 (Sacae Route) 
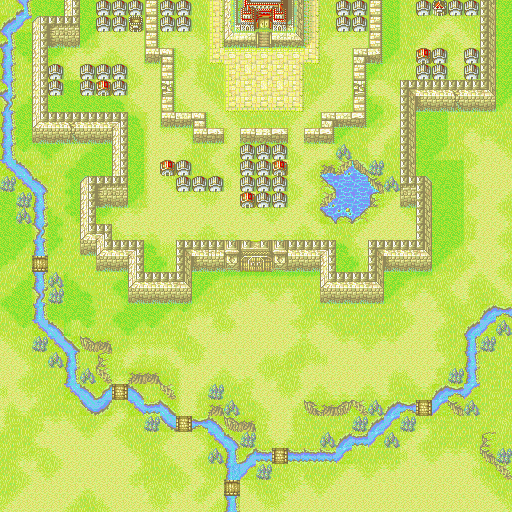


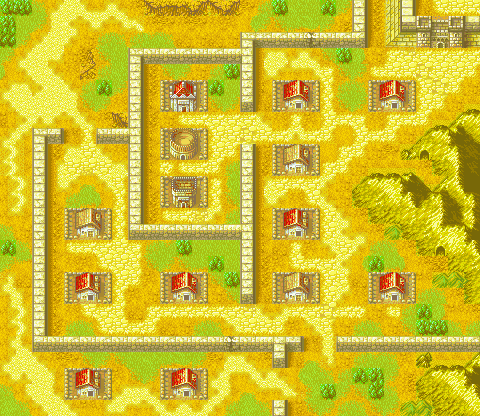
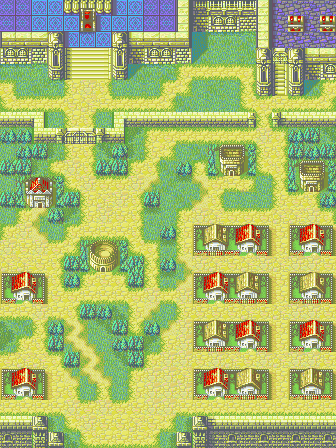
I'm kind of torn when it comes to this map. There's this weird design duality where this map somehow both encourages turtling and discourages it. This chapter begins with several waves of enemies coming at the player in addition to having a couple of enemies start out near the player. These enemies encourage turtling because they're so close to the player, and they're aggressive too. That being said, once those enemies are gone, the chapter will proceed to throw a bunch of enemy reinforcements at you from behind. These enemies in general do a good job at forcing the player to play faster. I will say that some enemies appear on houses potentially right next to the player, which can cause some resets. Overall though, I do think this map is a net positive in pressuring the player since it manages to provide numerous enemy reinforcements after the initial wave.

This map also provides two interesting methods of approach via the cracks in the wall. It's helpful for avoiding the main army. I do wish that the game told you that the front gate can't be opened via thieves or the Unlock staff. The last noteworthy aspect of this map is that the boss has absurd Speed. Gel has 27 Speed, which means that double attacking doesn't exist unless you're using a Brave Weapon. Plus Gel's Avoid is stupidly high which means that fighting him is an exercise in frustration. 

With all this being said, this is so far the most interesting in the Sacae Route that I've played so far.

Chapter 19 Ranking: Decent 

____________________________________________

Chapter 20 (Sacae Route)
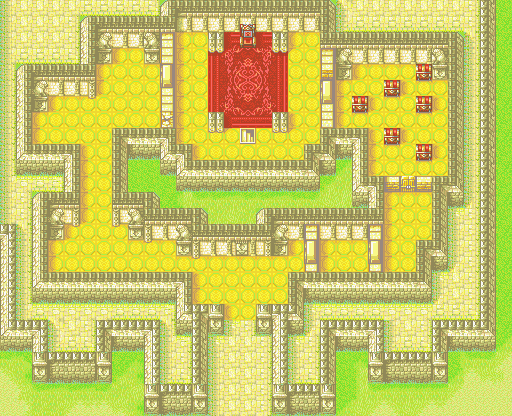

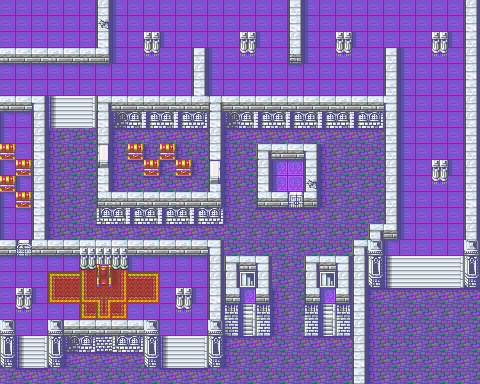
This map is like a slightly better designed version of Chapter 16x. This map throws a lot of ballistic siege tomes and status staves at the player, which is probably the best part about it. The map provides a side objective in the form of treasure, but fails to threaten that treasure so the player has all the time in the world to get it. FE Wiki says that there are thieves that will try to get said treasure, but I never saw them and I play casually. This map would have been stronger if it tried to punish turtling harder. 

Chapter 20 Ranking: Meh

_____________________________________________


Current Map Design Rankings So Far

Excellent: 4
Pretty Good: 4
Decent: 3

Meh: 6
Below Average: 4
Fail: 3

Monday, July 13, 2020

Binding Blade Map Design Review: Chapter 8x - 14

Chapter 8x


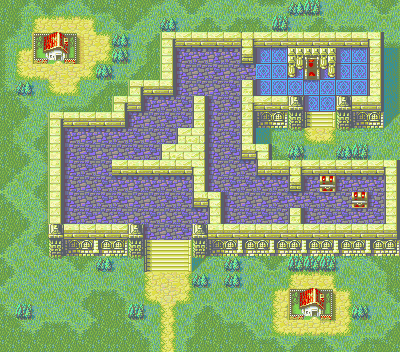
Not going to lie, I really don't like this map. My biggest problem is that whoever designed it didn't take into account the fact that the Rescue mechanic exists and that Thany / Shanna can para drop someone.

 As the picture demonstrates, my main strategy for this map is to move to the right, have Thany / Shanna drop Rutger (who is usually promoted by this point) across the chasm, have Rutger kill every enemy on his way to the throne (including the boss) and then have Roy seize. This kind of makes the rest of the units for this chapter feel completely irrelevant. 

Chapter 8x Ranking: Fail

____________________________________________

Chapter 9


Chapter 9 really doesn't do it for me. One problem I have with this map is that it has Fog of War. For those of you who don't know, I really don't like Fog of War. The idea of a mechanic actively hiding enemy unit placement contradicts the entire point of a strategy game like Fire Emblem. It feels kind of like an artificial way to make maps more challenging. The path forward is pretty uninteresting and thanks to Fog of War you can't even tell when the house to the bottom left is being threatened by brigands. The gimmick of picking a village determining your route is neat, but it doesn't really help the map out much.

Chapter 9 Ranking: Meh

________________________________________

Chapter 10A


I picked the A Route for this map design review. The plan right now is to play the game, review the A route (and the Sacae route) and then after I'm going through this playthrough to go back, play the game again and play the B route / Ilia Route. 

As for this particular map: Like the previous map, this isn't anything to write home about. The direction of this map is pretty straightforward and uninteresting. The village to the right is closer to the player than to the brigands on the left so it's pretty easy to get to it before the enemy does. There's not much else to comment on, it's a pretty uninteresting map.

Chapter 10A Ranking: Meh

__________________________________________

Chapter 11A

Fun fact: I've fan gushed about this map before: https://thecrusadergrant.blogspot.com/2018/12/top-10-favorite-maps-to-play-on-part-2.html

Chapter 11A of Binding Blade is one of my all-time favorite maps to play in the series. I agree with everything I wrote in the previous post so I'm gonna copy / paste it here:

"These maps are wonderfully chaotic in the best possible way. The reason why I'm listing these two is because they play the exact same way. So let's take a look at all the wonderful side objectives that these maps provide:

  • Recruiting Echidna, Klein and Tate
  • Rescuing multiple villages
  • Obtaining several promotion items
This map will keep you busy in the best possible way. Recruiting Klein and Tate is a little tricky. What's even more tricky? Trying to recruit them without killing a single member of their respective armies. That requirement is the epitome of "frustrating, but in a good way." The reward for keeping their NPC armies alive is that you get a promotion item. One of them is an Elysian Whip, which you can use to promote Miledy. The other one is an Orion Bolt, which can either promote Shin or provide a lot of money.

Image result for fire emblem binding blade chapter 11a

The villages will also be threatened too, so if you didn't get the message PLAY FAST! According to the wiki the villages net you "Visit 8 villages for Restore, Dragonshield, 5000G, Speedwing, Orion's Bolt, Sleep, Axereaver, and an Angelic Robe". 

So yeah, there's a lot of valuable stuff. Definitely worth saving if you ask me. Bytheway, if you save all the villages you'll get a Hero Crest. It's as if these maps are going overkill in rewarding the player. I like overkill.


In both maps Echidna will also be threatened by enemies. As if we didn't already get the memo it's blatantly clear that if you want all of the wonderful goodies you're going to have to earn them....and I freaking love it. I wish more Fire Emblem maps would require the player to be this busy. It keeps you engaged because there's never a dull moment and there's an immense feeling of satisfaction that comes from getting everything because you know that you earned it."

Chapter 11A Ranking: Excellent

___________________________________________

Chapter 12


During the previous post I mentioned how Chapter 8 had enemies use a more creative variety of weapons. This map takes that same concept and amplifies it to wonderful effect. In this map enemies have access to the following:


  • Status Staves
  • Longbows
  • Silver Weapons
  • Multiple 1 - 2 range weapons
  • Long Range Ballistic Magic

The presence of these things makes the map much more interesting to play as it gives enemies the power to threaten the player. The archers with longbows can cause the player to think about where they're going to place their units throughout the winding halls. The status staves and Eclipse definitely make the player pay attention to where they're supposed to go. All of these weapon choices reinforce the importance of unit positioning.


This map provides treasures on both of its sides, which gives the player a legitimate incentive to split their army up and approach the map from different sides. Cath once again shows up and tries to threaten the treasure on the right, which works as a turtle disincentive. Raigh being on the left provides an extra incentive to approach the throne from the left.

 This map also has enemy reinforcements that charge at the player from behind, forcing the player to play faster. Chapter 12 also has a Gaiden requirement. In order to unlock 12x you have to beat the map in 20 turns or less. For a Casual player that does make a difference, since it means that the player can't take all day getting treasure and killing enemies. Overall, this map has everything you could ask for when analyzing map design.

Chapter 12 Ranking: Excellent

__________________________________________

Chapter 12x


This map has more going for it than I gave it credit for. There are multiple thieves throughout the map who will either steal, or attempt to steal, the wide variety of treasures. This works as a means of getting the player to play faster. This map also provides the player with multiple routes with which to approach the throne. Given how well spread out all the treasures are, you do have an actual incentive to split your army up. Fog of War shows up again, and it encourages the player to play more cautiously since you don't know where enemies are. This map would have been better if you were able to see where you're going.

Chapter 12x Overall Ranking: Pretty Good

____________________________________________

Chapter 13


Having just played this map today, the first thing that stood out to me was the variety in enemy weapons. Killer Weapons, Silver Weapons, Reavers, 1 - 2 Range Weapons, etc. 

Having enemy units with weapon variety like this makes them more interesting to deal with. This chapter also starts throwing out more promoted enemies like the Paladins and the Hero at the bottom left hand corner of the map. Having stronger enemies provides a legitimate challenge to the player without having to resort to b.s. (Take notes modern Fire Emblem. This is how you do challenge right)

Perceval's presence is interesting, as it's basically the game dangling a carrot in front of the player's face. But it's pretty hard to recruit Perceval in this chapter, so there's an element of risk-reward at play. 

Perceval | Fire Emblem Wiki | Fandom


The enemy unit positioning is also interesting, because the Wyvern Riders in this chapter threaten the player in an interesting way. They can fly, and aren't hindered by the restrictive terrain of the bridges in the same way that the player is. Plus, these Wyvern Riders are tough enemies to beat so you have to be careful when dealing with them. One element I haven't brought up that works are the ballista. They require the player to pay attention to their unit's positioning, but if the player manages to take control of them, they can be used against the enemy Wyverns. That's actually a pretty ingenious way to incorporate ballista.

Unfortunately there is one problem I have with this map. Chapter 13 has a similar problem to the Ninja level in Conquest. Both maps provide turtle disincentives, but they also undermine those turtle disincentives with their terrain. You see, it's very easy to have two durable units sit the choke-point in the bridge and hold off the enemy horde. I speak from experience here, because I just did a few hours ago with this map and I also did that with Conquest Chapter 17. So I do have to dock this map a rank for undermining its own turtle disincentive.

Chapter 13 Ranking: Pretty Good

_________________________________________

Chapter 14


Oh boy. It's this map. Chapter 14 happens to have two gimmicks that I'm not a fan of. The first gimmick is Fog of War. The second gimmick is the desert gimmick. I'm not a fan of most desert maps because they're a slog to play through for any unit that isn't a mage or a flier. Combine those gimmicks together and you get a very unpleasant experience. What's worse is that this map has multiple Wyvern Riders that can fly from seemingly out of nowhere, and can wreck you. It also doesn't help that there are multiple Manaketes that you have to deal with too. 

The only thing this map does well is apply pressure on the player. Not only does this map provide numerous enemy brigands that can swarm behind you, it also has a Gaiden chapter that comes right after it. In order to get to that Chapter you have to complete this map in less than 25 turns, which matters to those of us who aren't doing ltc runs. 

The turtle disincentives are good enough to prevent this map from getting the rank of "Fail", but unfortunately that's the only thing this map gets right. I'm also not a fan of the two units you're given here. Sophia is notorious for how bad she is, and Cecilia is on a horse so her movement is very limited. At least this map gives you some sweet loot.

Chapter 14 Ranking: Below Average

Friday, July 10, 2020

Binding Blade Map Design Review: Chapters 1 - 8


Chapter 1
Chapter Maps - Serenes Forest

Chapter 1 of Binding Blade is one of the best designed first chapters in the series. In order to understand why I'm making this distinction we need to talk about how the first chapter of a Fire Emblem game normally works. 


Dondon151 brought up an interesting point during his 0 % growths run of Thracia 776:

            "So Fire Emblem 5 has one of the most well designed chapters in the entire series in my opinion. Most Chapter 1's treat the player like an idiot..."


            Not only do I agree with Dondon here, but I'd like to offer my take on what the issues of many first chapters in the series are. Most first chapters have two major problems:


  • Most of them either give you 2 characters to use or less, or if they do give you more characters to use, it's usually a better move to solo that chapter with one of them. This is a pattern that you see in Fire Emblems 7 - 9 & 12 - 15.

This hurts the strategy of the game since there's only so much you can do with 1 - 2 units. It limits your choices and it doesn't make the game as fun to replay.

  • The second major problem is that the maps are usually really small. This further limits where the player can go and what they can do. As a result, these two factors rob the first chapter of any strategy they might have had. 
Binding Blade Chapter 1 | Fire Emblem Amino


Binding Blade's first chapter doesn't have those issues. You're given 6 characters to use right off the bat instead of 2. The map is also significantly bigger, which means that there's more room to move around. 

This chapter also does something really cool: It threatens the house to the player's right with a brigand. This little design choice incentivizes the player to play faster. Turtle disincentives NEVER appear in the first chapter of a Fire Emblem title. So for Fire Emblem 6 to come along and do this really makes it stand out from the rest. 

If you play this game on Hard Mode (which is what I'm doing and the map design reviews will be based on this game being played on Hard Mode) then the enemies are actually pretty powerful, which means that you have to be careful about where you place your characters. 

First Chapter Ranking: Pretty Good.        

________________________________________________

Chapters 2 & 3


I'm gonna group Chapters 2 & 3 together because they both have the same rank and suffer from the same issues.
Chapters 2 & 3 Rank: Meh

The first problem with both maps is that they encourage the player to turtle. This problem is especially true of Chapter 2 where there are two different choke-points on the map. This screams "park a powerful unit here and let them kill everything". It's the opposite of what you want a good map to do, is which get the player to play faster. Chapter 3 incentivizes turtling in a more subtle way by having the enemies start out so close to the player and then having the enemies aggressively charge the player. 

Another problem these two maps share is that they both place the various houses where you can get items and recruit Lugh in weird spots. None of the houses are threatened so you have all the time in the world to get them, and both chapters also have a house that's positioned behind the player, which requires said player to get a horseback unit to ride behind and get that item. 

Chapter 3 tries to disincentivize turtling with its enemy reinforcement placing near the boss, but even that just winds up encouraging turtling since those enemies are placed directly in front of the player, and there's an easy choke-point on that part of the map that makes defeating those enemies easy.

________________________________________________

Chapter 4


Chapter 4 feels like a major step up from the previous two chapters in a couple of ways. For one thing, the village to the south is further away from the player, and actually gets threatened by pirates so the player has to hurry up in order to gain that treasure. 

Then the game provides a further turtle disincentive by having pirates start spawning en masse and then having cavaliers show up behind the player and start attacking the player.  

Then there's Rutger. I have mixed feelings about the way this chapter handles Rutger's inclusion. It's cool that a powerful enemy-turned-ally can actually cause the player to be cautious since you don't want to kill him, but you also don't want to be killed by him. Rutger's presence on the map provides a puzzle for the player to solve. Plus the fact that Rutger can only be recruited by Clarine means that you have to be mindful about where she is in relation to him, and you have to have Roy at the right spot in order to recruit Clarine.

Rutger/Gallery | Fire Emblem Wiki | Fandom

On the other hand, his presence is hidden from the player, and unless you already know how far he can move it's very likely that Rutger can possibly crit you and cause a restart. I imagine that it's moments like this where Binding Blade's same turn enemy spawns piss people off. For what it's worth, I think you could have had all the same tactical benefits by simply having Rutger on the map without having to make his inclusion a surprise. So overall, I consider it a mixed bag. That being said, it does add to the strategy of the level, it just could have been done better. 

Chapter 4 Ranking: Pretty Good

________________________________________________

Chapter 5


By far my least favorite early Binding Blade map. This chapter always feels like a slog to play through whenever I'm trying to get through it. 

The only good thing I can say about this map is that it at least gives you two ways to approach it. You can take the long way around or you can move to the gate on your left and try to fight the enemies there. 

Either way, you still have a massive glob of enemies sitting near the castle, and it's unlikely that you're going to be able to get around them. The village to the north doesn't usually get threatened (at least, I'm able to beat this map before the brigands show up) so there's plenty of time to get it before beating the map. 

Chapter 5 Ranking: Below Average

________________________________________________

Chapter 6


This is an example of a map that I always look forward to playing, and here's why:

This game gives you three routes to approach the throne, and gives you valid reasons to take those routes. Getting attacked from three different sides helps, but there's also the fact that there are both treasures and Sue (who some would argue is a treasure) that you can acquire. 

But wait, the treasures are actually threatened by Cath, a character that looks recruitable. Cath's presence makes the player have to think about where they want Roy to be so he can talk to her. The thing here is that even after Roy's finished talking to Cath, she'll still try to take the treasure, so you still have to deal with her (I recommend using Chad who will live up to his namesake by stealing one of her lock picks, which is pretty funny).

Chad vs Cath, since we are doing dead memes : fireemblem

In addition to all these treasures and having to deal with Cath, this map does actually throw enemy reinforcements at you which means that you'll have to play faster. The first wave of enemies near the throne slow you down and give the enemy reinforcements behind you time to catch up. So in short, Chapter 6 is a textbook example of what a well designed map should look like.

Chapter 6 Ranking: Excellent

________________________________________________

Chapter 7


Binding Blade Chapter 7 is one of my favorite maps to play in the series. I've fan gushed about this chapter before, but the more I get a chance to gush about this map, the better. 

So this map starts by immediately putting pressure on the player in the form of having Zealot and Treck appear far away from the player in the midst of a group of enemies. Zealot may be powerful, but he's not invincible and if you don't get to him quickly he's going to die. Zealot is like a second Marcus, so you definitely want to save him. Treck and Noah are also worthwhile additions to the army so you'll want to blitzkrieg over in their general direction.

My Fire Emblem Blog: Analyzing Chapter 7 Binding Blade

But wait, this map will still throw another turtle disincentive at you. Even after you manage to clear out all the powerful enemies, this map will provide not one, but two waves of enemy reinforcements that will charge you. Just like Chapter 6 there will be one group of enemies near the throne and another group of enemies that will attack you from behind. And just like in Chapter 6 this powerful combo is effective at putting pressure on the player to play faster and rush to the throne.

As if that weren't enough, you also get numerous houses and treasure spread throughout the map that can give you access to a wide variety of amazing goodies. We're talking about getting another Killing Edge, a Physic, a Red Gem and a Hero Crest. All of those items are amazing and are totally worth getting. 

The enemies in this map are also great. This map is the debut of the Wyvern Riders, which are powerful, tanky enemies that dish out lots of damage, can take the hits and have high movement to boot. These things are scary. As if that weren't enough, a lot of enemies on this map tend to pack 1 - 2 range weapons which makes them an even bigger threat. The combination of Cavaliers and Armor Knights means that dishing out damage is harder than usual since these are bulky enemies. Combine them with the Wyvern Riders and you've got a powerful combination of enemies that can pose an actual threat to the player. In the end, this makes Chapter 7 the personification of "tough but fair while also being very rewarding to play". 

Chapter 7 Map Ranking: Excellent

_____________________________________

Chapter 8


Chapter 8....is fine. The map's biggest saving grace is that it effectively uses enemy reinforcements to push the player toward the throne once the throne is within reach. Seriously, it seems like there are more enemies charging at the player from behind, then from the front.

Another clever trick this map throws at you is that it gives an Armor Knight at the front of the level a Horseslayer. This is a brilliant move because this map is huge and incentivizes the player to rescue chain with their mounted units. Putting a Horseslayer near the front makes it easy for the player to not pay attention and be met by a crazy surprise as their favorite mounted unit is met with a 1 Hit KO. 

Fire Emblem Sword of the Seals Guide - Fire Emblem WoD


Cath shows up again trying to threaten your treasure. Once again she serves as the game's way of saying "Get to the treasure fast scrub." This chapter also gives an Armor Knight a Killer Lance later on, which is another great example of forcing the player to pay attention to the enemy inventory.

Unfortunately there are a couple of problems with this map. The beginning portion is kind of boring, as it's a really long hall that just screams "use your mounted and flying units to rescue your infantry." 

The other problem with this map is that tries to do something clever with Lilina by placing an archer next to her. The problem with this approach is that there's always an empty square where Lilina can run to and once the player gets to a certain spot on the map, the enemy archer just ditches Lilina anyway. It's not terrible, or even bad, it's just a missed opportunity to put additional pressure on the player. 

Chapter 8 Ranking: Decent

___________________________________________________

Map Design Totals So Far

Excellent: 2
Pretty Good: 2
Decent: 1

Meh: 2
Below Average: 1
Fail: 0

This is a pretty solid start for the game. Over half of the early game maps are fun to play. This game really knows how to put pressure on the player, which makes the maps exciting to play as. Plus, these maps know how to balance out between enemy quantity and enemy quality. The early maps give you a good idea on what to expect for the rest of the game, and I have to say that it's a promising start.

Thursday, July 9, 2020

A Reintroduction to My Map Design Criteria

Chapter Maps - Serenes Forest

Hey guys! The last time I wrote on this blog was January. Isn't it crazy how fast time flies? Anyway, I figure that before I go into the Map Design Reviews for Binding Blade I'd make my Map Design Criteria known in case anyone forgot. I'm basically going to copy / paste the blog post I wrote about this 3 years ago:


Map Rating Criteria
  1. Multiple Approaches: Are there 2 or more routes the player can take toward reaching a boss? Are they meaningful? Is one route significantly better than the other ones presented?


  1. Turtle Disincentives: How does the map punish turtling? If you don’t know what the definition of turtling is here’s the Wikipedia article. Some maps will instead hand the player a reward for going faster instead, like giving them more money or a gaiden chapter. This counts for fulfilling this requirement.


  1. Side Objectives: NPCs, villages to rescue, etc. This isn’t something that a chapter has to have but it does count as brownie points when certain maps do this well.


                         Another thing I’ll be looking for will be things like super easy ways to trivialize a map. Examples of this will be like having a paired up wyvern fly in a straight line and thus beat a map in a few turns. (Conquest says hi)

Warp skipping doesn’t count because warp can trivialize almost any map. Being trivialized by an infinite range warp staff says less about the map and more about the warp.


I should also point out that some maps don’t necessarily have to have all these things. Exceptions to these rules exist, but I’ll make sure to explain why whenever that map comes around. The first maps of the game will generally be rated more leniently because none of them fulfill important requirements. Instead, they have a different criteria that I’m looking for.

Fire Emblem: The Binding Blade / YMMV - TV Tropes


  Here is the rating system I’ve come up with:


  • Excellent: The highest map rating. Goes toward maps that do the positive things well. This is for the best designed maps in the game.

(Note to the Reader: The highest ranking used to be called "Pass". Somebody pointed out that this was too underwhelming for a top tier map rating. I agree with that statement so I changed the name to "Excellent" instead of "Pass". I also went back and retroactively changed all the maps with the "Pass" rating to "Excellent" now.)


  • Pretty Good: A great map that has a couple of things that prevent it from getting the rank of "Excellent". The second highest map design rating.


  • Decent: This rating is for maps that have more positives than negatives, but have more noticeable negatives.


  • Meh: A mediocre map. Not terrible per se, but also not great either. The first of the negative map design rankings.

Oh... | Fire Emblem | Know Your Meme


  • Below Average: A bad map with a couple of redeeming qualities that prevent from being utter crap.


  • Fail: The lowest map rating. This is reserved for maps that either don’t do anything well or are really easy to undermine.


          At the end of a game’s map rating I count up every single map that gets a “Decent” rating or higher (Pretty Good and Excellent) and then divide that by the number of total maps in the game. That becomes the game’s rating on how good their maps are. I should also point out that if a game has multiple routes (like Thracia 776 or Binding Blade for example) then all maps from all route will be taken into account. I hope you enjoy the map ratings."

____________________________________________________

Feel free to make comments on if you think something here needs to change. I should be out with the map design review for the beginning chapters of Binding Blade Hard Mode soon. :)

Saturday, January 4, 2020

Favorite Three Houses Characters Part 1: Claude

Image result for fire emblem claude post timeskip


So I've been wanting to go into a deeper dive on my favorite characters and make a "Top 10 Favorite Three Houses Characters" list. So here we go.


1) Claude
Image result for three houses claude

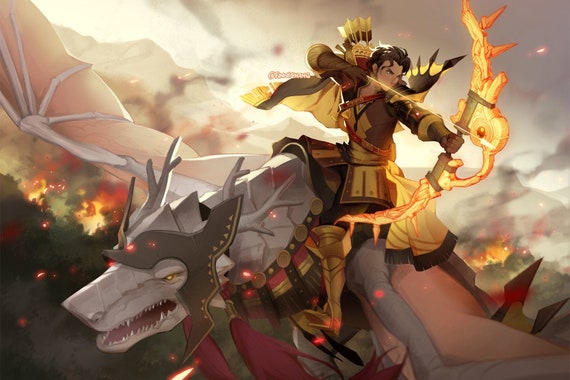
Claude is easily my favorite character from Three Houses. Heck, he's tied with Ike for being my favorite Fire Emblem character. Claude has a wonderful combination of tactical brilliance, wit and charm. He also gets many of the best lines in the game. Some of my favorite Claude moments:


  • His trolling Lysithea 
  • His conversation with Edelgard where he temporarily riles her up during one of the mock battles.
  • Claude's introduction of Hilda to Byleth 
  • This quote in Chapter 20 about Edelgard: "She's a fellow student to all of us. If there's a path that we can walk together, that would be preferable. But that all depends on Edelgard. If she won't yield, then that's that. If showing pity would put my allies in danger, I will not hesitate to kill her. I ask that you and everyone here prepare yourselves to do the same."

That last quote displays a neat attitude for a Fire Emblem lord to have. Claude prefers diplomacy and talking things out, but if push comes to shove he WILL use violence and end the threat. He's pragmatic without going overboard about it the way Edelgard does.

Claude's tactical nature being put on display is really fun to witness. One little addition I liked was how he was coming up with a non-lethal poison or how he was planning to use it on the other students during the battle of the Eagle and the Lion. Even his talk with the other houses / students about getting the prize versus them getting the glory is pretty funny when you stop to think about it. Him maneuvering around House Gloucester in his own route was great to behold. I could keep going but the overall point here is that the game does a good job showing us his tactical brilliance and in a strategy RPG game it is nice to see a main character who's forte is tactics and strategy.


Related image

I recently came across a brilliant in-depth essay about Claude that I highly recommend reading:

https://www.reddit.com/r/fireemblem/comments/dhy0vg/unmasking_the_master_tactician_an_analysis_on/

^ One of the interesting things it brings up is that Claude's Japanese version is more explicit about his willingness to use violence to achieve his ends. I still think his English version gets the point across from the line I quoted, but when you stop to think about how big of an obstacle Rhea is for him it makes a lot of sense that Claude would be okay with her being dead. Heck, Claude even admits to Cyril in their B support that he'd be willing to take her on as an enemy. There's a comment made after the essay that also sheds light on his character:
"IMO, he's a bit like Margaery Tyrell from Game of Thrones. (Talking about TV Margaery here, since she has a much more prominent role.) Like Claude, Margaery is quite cunning and manipulative, happy to use others for her own advancement. But Margaery and Claude both benefit from the people around them appearing so much worse by comparison, and from their own manipulations being relatively bloodless. No one's gonna complain about Margaery when Cersei's running around, and likewise, Claude does seem rather benign compared to the other faction leaders.
Personally, I thought this was a rather clever narrative trick in both cases, since it lulls the audience into a convenient false sense of security along with the characters in the story. Claude is aggressively charming in Verdant Wind, and it's easy to forget that behind that charm lies the guy who wanted to cut down the mountains with the Sword of the Creator. IMO, it gave the moments where Claude tips his hand (the arrival of Almyran troops, his angry confrontation with Rhea) a lot of narrative punch."

Related image

Another interesting point about Claude that that reddit link brought up is that his closed off guarded nature has a more interesting dynamic to it when you realize that he has to be this way because of Fodlan's xenophobic / racist tendencies. Thanks to Rhea and the Church, Claude has to be more guarded and distrusting because if he's more open he could be killed. If you look at his support with Leonie and Petra we see that Claude has a profoundly different view of religion than the Church. In his support with Leonie it's mentioned that his view of nature could be viewed as heresy. This is a more subtle take on prejudice and intolerance and it also gives Claude's dream more extra weight and a bigger narrative punch to it. 

One more aspect about Claude that I'd like to bring up is just how much of a refreshing contrast he is to Dimitri and Edelgard. Both of them have dark, dramatic backstories and both are at each others throats. Claude brings a fresh perspective to the story that Three Houses needed. His willingness to get answers from Rhea about Fodlan and its history was great to watch and it was nice that the game bothered to show us how the conflict looked from an outsider's perspective. Claude opens up the idea that there's more to the world of Fodlan than just the Church of Seiros, or the conflict between Adrestia and Faerghus. 

 It's kind of ironic how the outsider of the Big Three is the one who ultimately finds out about the bigger picture. The Golden Deer route was my first route and it provides a wonderful backdrop to the history and lore about Fodlan's world. 


To sum it all up: Claude's hilarious, tactical, pragmatic, went about changing Fodlan in the best way and he brings a much needed extra perspective to the story. His supports are a ton of fun to read and he stands out from both the lords in his game and the lords of other Fire Emblem titles in all the right ways.

Thursday, January 2, 2020

Fan Gushing Fire Emblem Three Houses Part 2 - The Gameplay

Image result for fire emblem three houses wallpaper


So, there's a lot I'd love to say about the plot and characters, because there is A TON beneath the surface, and it's really surprising how much depth this game's world building, characterization and story has but I can't gush about any of that stuff without spoiling the plot. So for now I'd like to talk about the positive aspects of the gameplay behind Three Houses. 

To be blunt, I have a lot of criticisms about the gameplay of Three Houses, but for now I'd like to focus solely on the positive aspects that I enjoyed. I promise in a future blog post that I'll talk about the flaws of this game. For now, let's fan gush.

Image result for fire emblem three houses weapon ranks

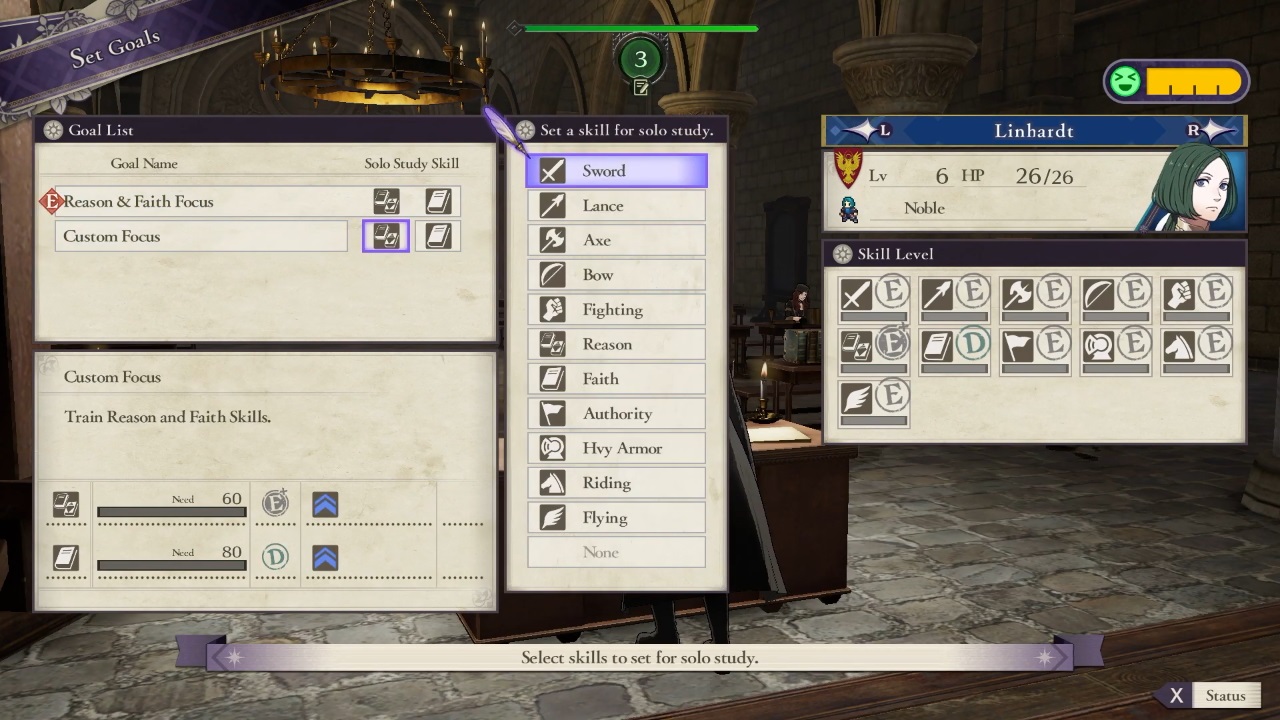
Weapon Ranks: One of the coolest changes that Three Houses made was to make weapon ranks a much more prominent part of the game. Weapon ranks in past Fire Emblem games were always...there. They didn't play much of a role in the strategy of the game outside of figuring out who gets a Training Scroll.

 In Three Houses, weapon ranks are front and center to how you level your units up and even promote. If you want your character to promote to a certain class you have to get the appropriate weapon ranks. Not to mention the fact that there are skills tied to weapon ranks too. What this does is force the weapon ranks to be part of the player's planning when they're trying to figure out which character becomes which class. It's a fantastic change to an often ignored mechanic of the game and it succeeds for the most part.

Image result for fire emblem three houses garreg mach monastery

The Garreg Mach Monastery: One of the most pleasant surprises that this game had to offer was how well it handled the home base system. This is easily one of those mechanics that could have pissed off veterans like me, but it works really well in the long run. 

This is a fantastic home base system. In fact, I actually like Three Houses home base system the best out of all the home bases that you get in the series. The Garreg Mach Monastery serves several purposes that winds up making it so much fun:

# 1: It Makes the World More Immersive: The Garreg Mach Monastery doesn't merely feel like a base, it feels like an actual school where people live. It feels like a place that someone would call home. This is part of the reason why we all invest hundreds of hours into this game. There's tons to do and lots of amazing interactions. Part of the immersive process comes from another advantage that the Monastery presents: It lets the characters actually react to the events of the story. 

Related image

One criticism that I've seen of past Fire Emblem games is that a character will die and nobody will respond to it. Some of the past Fire Emblem games had major technological limitations that served as the reason why, but this excuse becomes less justified with each new installment. Three Houses finally does away with that and lets the characters react and respond to what's happening in game. This helps them feel like they're real people. It also ensures that the events of the game leave an actual impact on the player. 

# 2: It Makes Planning and Preparation Fun: One of the main ingredients behind the success of Three Houses comes from the fact that this game capitalizes on a key component of RPGs that a lot of players enjoy: Customization. A lot of people love making their characters into any class that they want, have any skill set that they want, and have any assortment of powerful weapons and classes that they want. Three Houses puts this aspect of gaming front and center. Not only does it do that, but it does something else: It makes that planning and preparation extremely fun to do.

Image result for fire emblem three houses garreg mach monastery 

For most RPGs, the beginning parts of the game feel like they're a means to an end. The beginning is where you put in your hard work, which will eventually pay off in the later parts of the game. The middle and end of the game usually are more fun because those are the parts of the game where you get to see all your hard work pay off.

Three Houses by contrast flips that dynamic. In this game, the training, planning and preparation are usually the most fun aspects of the game. Why? Because so much of this game revolves around it, and is fun to do. Everything in this game feels like a mini-game that requires effort on the part of the player. Want to make your character a Wyvern Rider? Well you better invest in that axe and flying rank. Want to recruit that character into your House? Better build up that support rank. It may sound monotonous on paper, but the end result is that you get complete control over every little detail in your army. The end result is that you get to make more choices and you have more tools at your disposal to make your strategy a reality. 

Image result for fire emblem three houses

# 3: Support Ranks & Recruitment: The best example of the positive effects of Three Houses emphasis on planning and preparation is in its supports (and recruitment). There are a lot of ways to build up support ranks in Three Houses, and the fact that you can build up support ranks as much as you can helps to make them all the more satisfying because each support rank is the result of your hard work paying off. It also helps that Three Houses has top tier support conversations too so that makes you want to put in effort just to see this wonderful cast interact with each other. 

Recruitment also works like this. One of the biggest positive changes that Three Houses made was to change how recruitment works. Instead of having one person talk to an enemy unit on a battlefield, you can now recruit characters by simply having a B rank support conversation with them. This change to how recruitment works means that bringing characters to your house feels far more deliberate and methodical. Instead of treating characters like Pokemon where you "gotta catch em all" you instead get to pick and choose which characters you want to have in your army. Because recruiting takes more time and effort to complete, you get the feeling that you should do some research to figure out which character you want to invest the time and effort into recruiting. The point here is pretty simple: Recruiting somehow feels more tactical and deliberate than just picking up another character off the battlefield. 

Related image

There's more I could say, but this post is getting longer than I expected. Let me know if there's something you want me to address in the next post about gameplay.

Monday, November 18, 2019

Spoiler Free Three Houses Fan Gushing Part 1

Image result for three houses wallpaper"

Oh...my...gosh. They did it. They freaking did it! Intelligent Systems actually made a new Fire Emblem game that surpassed Holy War. I didn't even know that was possible! Bravo Intelligent Systems. Bravo.

Fire Emblem Three Houses is a spectacular addition to the franchise that managed to give me what I wanted out of a Fire Emblem: Moral Gray, a well characterized cast of characters, and a sense of world-building and politics that had actual effort put into it. I did not expect the game to be THIS GOOD.

So why do I like this game so much? Well to put it succinctly:


  1. The Conflict is Thought Provoking: A plot cannot happen without conflict. Good stories have engaging conflicts that draw you into their world. This is one of the major strengths of the plot of Three Houses; the conflict actually makes you think. There's a lot of ambiguity here about who was right, who was wrong, and how one would go about solving the problems of this world. This is the type of story where someone can actually side with the main villain and actually produce good arguments to support their position. No other Fire Emblem game has given us this. This is how you write a compelling story that involves Moral Ambiguity: You break the base. And that's what this game with its main villain. 

      2. Top Notch Worldbuilding: Fodlan is the love child of Tellius and Jugdral when it comes to worldbuilding. There's a lot of messed up stuff that happens in-universe. What makes this even better is that said messed up events have ramifications that affect the present course of the plot. Fodlan is a deeply broken society and its in dire need of a major change. The worldbuilding provides the sorely needed context that drives the conflict of the story. Because we see just how messed up this system is, and what its effects on the characters are, we are able to see why the cast acts the way that they do. We also see why so many people want to change the system. In conclusion, Three Houses's plot only works as well as it does because it effectively establishes the context the player needs to see just how screwed up its world is and why its in such dire need of being changed.

     3. Fantastic Characterization: Another major strength of Three Houses lies in its characters. This game gets my vote for the honor of being the "Best Characterization in the Series". The game does a great job spelling out the motivations of these characters. You totally get where they're coming from. Furthermore, Three Houses also adds layers to most of its cast. There were a lot of times in this game where my first impression of a character was one thing, but after reading their supports and getting to know that character, I came away with a very different opinion of them. You really do feel like you need to read all the supports in this game, because even in the latter supports you're still learning new things about them. Three Houses does a great job at showing its characters evolve and change their views on certain issues. As a result, this cast feels like it's populated with real people. It also helps that the voice acting breathes new life into these characters too. Shout out to Chris Hackney, the voice actor of Dimitri. Another major positive for this game comes from the fact that the supports are really, really good. The character interactions are solid and there's a variety of different emotions and character interactions you can experience in a given support. 

Image result for three houses"

4. Interesting takes on classic Fire Emblem Tropes: Another element of the writing in Three Houses that I noticed is how this game managed to take the same type of tropes that we've seen before in Fire Emblem and manages to spin that trope in an interesting direction. The narrative is better off for it, and it helps to set Three Houses apart from the other entries in this franchise.

5. Interesting Gameplay Tweaks: From a gameplay perspective there's a lot of neat little tweaks that Three Houses makes to standard Fire Emblem gameplay. Not all of them work for reasons that will be discussed later, but the ones that do work make this game immersive and interesting to play. The two immediate examples that come to mind are how Three Houses handles weapon ranks and recruitment. Three Houses takes two different elements of Fire Emblem gameplay, and it manages to make them more engaging. This is also emblematic of how Three Houses took a lot of different risks, and I think these risks paid off big time.

If this all sounds vague to you now, then keep in mind that this post is more designed to act as a preview of what's to come. This is the spoiler free version too, so I'm limiting myself on what I plan to say because I know that a lot of people reading this haven't finished the game yet. But trust me when I tell you that I have A LOT to say about this game. Once I finished the Spoiler Free version I'll be able to delve into more juicy details and discussion when the spoiler filled version arrives.

In the meantime, feel free to ask me questions about things you'd like for me to talk about. I'd be more than happy to include it somewhere on this blog.

Image result for three houses character winking"