Chapter 24
Not going to lie, this map is a lot better designed than I initially gave it credit for. The Dragon Vein gimmick, while totally in your face, works to incentivize mixed teams. Here’s what Fire Emblem Wiki had to say about it:
“If the player activates the Dragon Vein, all ground units (including the enemy) will gain extra movement based on half of their original movement. This means non-promoted fliers get 7 movement (5+2) and promoted non-flying units get 3-4 extra movement (giving them 9 for foot and 12 for cavalry). This is listed as a "Dragon Vein" bonus, so you can still stack more movement such as Boots (note that this will not add to the Dragon Vein, so a promoted cavalry unit would not get 15 movement), units that provide a movement bonus in a Pair Up and Rally Movement. Meanwhile, all flying units will have their movement halved following the same calculations, meaning that promoted fliers will have 4 movement (not including any movement boosts).
- If Hinoka activates the Dragon Vein, the opposite effect occurs (ground units get reduced movement, fliers get extra movement).” (Source: http://fireemblem.wikia.com/wiki/Hinoka_(Chapter))

The map provides a nice amount of Dragon Veins for the player to take advantage of. To its credit Chapter 24’s Dragon Vein is one of the better implemented ones in the game since the benefits are compelling enough to actually be worth using and even planning around.
Chapter 24 also does a phenomenal job of punishing turtling and providing a slew of enemy reinforcements at various locations. Some enemy reinforcements arrive on certain turns while others will show up when the player reaches a certain spot on the map. The mix up works to the chapter’s credit and succeeds at keeping the player moving.

The Kinshi and Falcon Knights are wonderful additions to the map because they can take complete advantage of Hinoka’s Dragon Vein and blick the player's units. On Lunatic Mode the Kinshi Knights have Bowbreaker which makes them harder to deal with since the player cannot shoot them down with bows so easily. Falcon Knights carry Bolt Naginatas which can undermine tanky units since they target resistance. Setsuna has Seal Strength, Pass and Swordbreaker which actually make her formidable to deal with. The addition of Pass means that the player cannot take advantage of her lack of 1 range by blocking her off with 4 different units, Swordbreaker means that the player can’t sick Xander on her and Seal Strength means that dealing with her will make killing enemies afterward a more painful process.
Hinoka is also a fair, but challenging boss. Her first skill is Wing Shield, which means that the player cannot trivialize her with bows. Darting Blow makes her more likely to double attack the player if she’s the one initiating the attack. Sol and Luna make her that much harder to deal with since she can either deal more damage or recover HP. Hinoka is also in a Dual Guard which means that Attack Stance cannot trivialize her and her stats, which are already high to begin with, are boosted even further. It also means that even if the player is able to defeat her they still have to go through her Pair-Up partner which makes seizing that much more difficult. Hinoka will generally have a Bolt Naginata and a Silver Nageyari which means that she can still deal a lot of damage by targeting resistance. It also means that if the player attacks her with ranged weapons she’ll still be able to counter them. That being said, the Bolt Naginata prevents Hinoka from using Sol and Luna (which makes me wonder why she was given those skills if she has access to a weapon that renders them null and useless).
Overall Rating: Excellent
Chapter 25
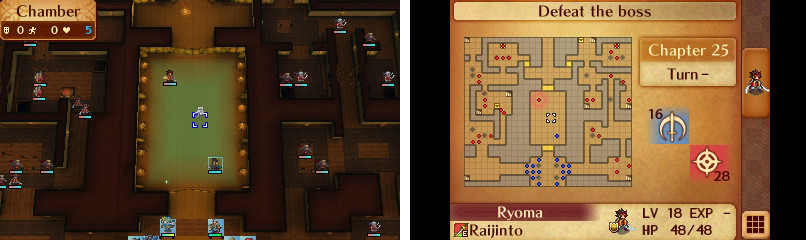
Note to self: 1 v 1 duels don’t mix well with Fire Emblem. They’re either a slog to play through if the player’s unit doesn’t have the stats to compete with whoever they’re dueling, or their stats are too high and the enemy they’re dueling becomes a total joke. Ryoma isn’t even that hard to beat with a right setup. See below for what I did during my Lunatic playthrough as an example:
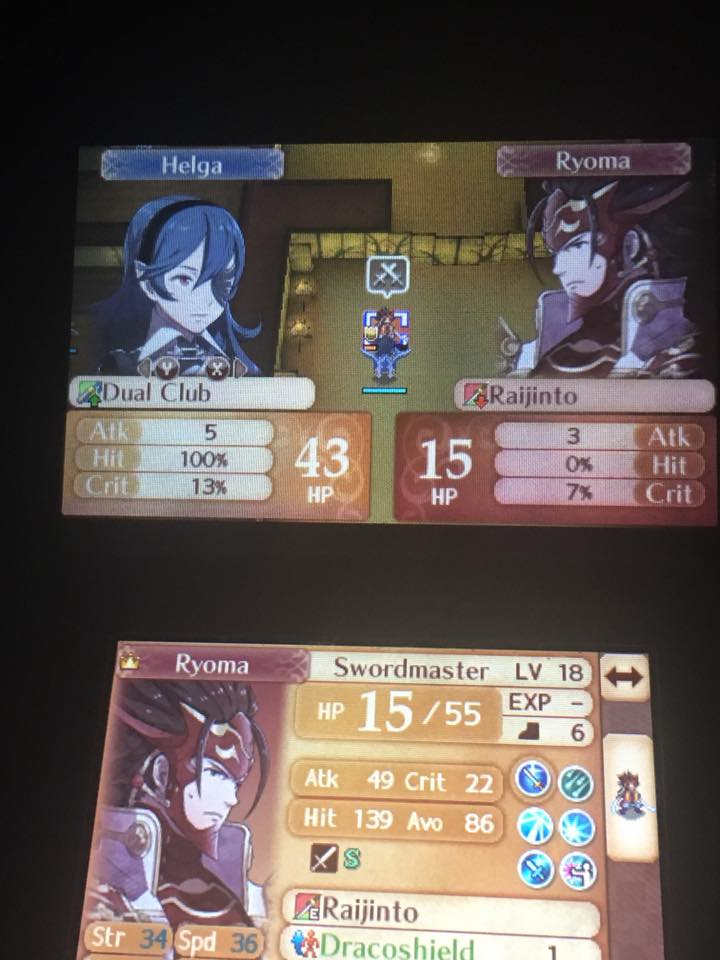
Swordbreaker + Dual Club = LOBSTER BISQUE! (See the video down below for the reference. Studio C is amazing!)
The Lunatic version of this map is just stupid. Inevitable End makes it ugly debut here which means that enemies can debuff any unit into the ground. There’s also one too many Lunge Automata too which make one of the hallway an even bigger pain in the butt. Lunatic Mode will also continue its tradition of randomly handing bosses (like Ryoma and Kagero) Rend Heaven in a cheap attempt to add difficulty. Oh and let’s not forget that Saizo and Kagero now have Inevitable End too.
Just to repeat myself here (because it bears repeating) that ultimately both ninja hallways are pointless since Ryoma can easily be trivialized, which means that the player can totally skip these hallways.
Overall Rating: FAIL!
Chapter 26
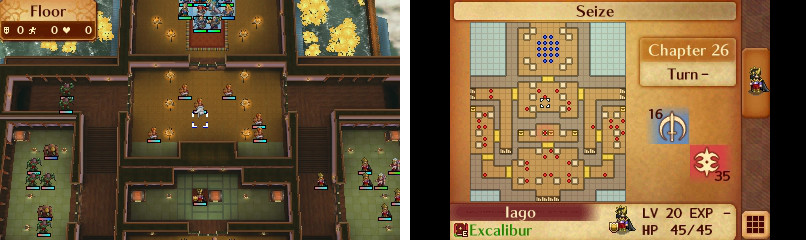
This map gets my vote for “Best Designed Conquest Endgame Map”. Let’s discuss: This map provides two different yet compelling routes toward Iago. The map on the left contains powerful Faceless, some of whom are Stoneborn. The room to the right contains sorcerers and maids. Both of the enemies here are powerful and are a force to be reckoned with. Before getting to either of these rooms the player has to clear out a room full of Hero units who have a wonderful combination of different weaponry and skills. Some Heroes will have Wyrmslayers and Counter which pose a very real threat to the player.
The bottom room is even more intense. Hans on Lunatic Mode is a legitimately dangerous boss. He has Certain Blow, Armored Blow, Death Blow, Counter and Countermagic. The “blow” skills make Hans a force to be reckoned if he ever gets the chance to pull off an attack and the Counter skills mean that the player has to pay meticulous attention to how they go about attacking him. In short, he’s a boss that make the player actually think. Thankfully he can be undermined by the Entrap staff, which will trick the AI and cause the enemy reinforcements to appear then.
The other enemies in the bottom room are also very powerful too. Generals carry Beast Killers and usually have Wary Fighter while Berserkers swing with Hammers. The end result is that the player will be forced to think carefully about what kind of units they’ll be using to deal with these threats since using the wrong type of class can result in a Game Over. There’s also two Generals with Countermagic too, which can throw the player off guard.
Last but not least is Iago. For some strange reason Iago is a Sorcerer that can use staves, even though the Sorcerer class cannot normally use them. Weird. Anyway, Iago is notorious for his ridiculous Staff Savant skill which automatically increases his staff range to 10 and makes his staves unbreakable. One cool thing that he does is that his staff usage is based on the order of his inventory. First he’ll use Freeze, then Enfeeble, then Silence and if the player is playing on Lunatic Mode he’ll be using the Hexing Rod. This makes his pattern predictable, which means that the player can play around it.
Now I want to talk about Staff Savant because it seems like opinions about this are divided. On the one hand I always consider it a sign of bad design to give enemies uber powerful skills that only they have access to. Plus an unbreakable Hexing Rod is bullcrap to the max. On the other hand, somebody pointed this out:
“An infinite hexing rod prevents the player from cheating their way out of it. In some maps, I place a staffbot or pair up unit in the range of the staff and let them get hit with it enough times before the staff's usage runs out. What Iago has prevents that from happening. At the same time it is kind of annoying to be peppered every turn with it, so I'm neutral on it.” (Source: https://www.reddit.com/r/fireemblem/comments/615ev2/fates_map_discussion_thread_42_conquest_chapter_26/)
I lean more toward believing that it’s bullcrap since there’s no real way to deal with it other than either take the hit or turtle out of his range. I would have preferred the game to have tried a different, fairer way of making Iago a threat without having to resort to a bs skill. In spite of this I still find the map to be incredibly well designed.
Overall Rating: Excellent
Chapter 27

This map has issues. For starters there’s the infinite range Entrap maids that will send different units to different rooms. I found some interesting tidbits about them on FE Wiki:
“The trick to manipulating the AI of the Shrine Maiden is to learn 3 facts:
“The trick to manipulating the AI of the Shrine Maiden is to learn 3 facts:
- They will Entrap your highest total stats available unit one by one. The distribution of which ally units entering which rooms will be based on which ally units function the worst against the enemy in said room (weapon triangle advantage, etc.).
- They will not Entrap units in rooms.
- They will not Entrap units in enemy range.” (Source: http://fireemblem.wikia.com/wiki/The_Empty_King_
The Awkward Stair gimmick returns for the last time. I actually find the stair gimmick to make the map significantly easier because if you get the right pair-up in the right spot then the end result is that the player can reach Garon sooner. The group guarding Garon is pretty strong with their mix up of Counters and Spendthrift. Unfortunately this group can be baited out which makes approaching Garon that much easier. Garon can be trivialized if the player fights him with a unit who has Axebreaker. If the player doesn’t have access to Axebreaker Garon can still be reasonably dealt with. He doesn’t have bs skills nor ridiculous avoid to deal with. While the map does provide enemy reinforcements that show up behind the player the chances are high that the player will be long gone before these reinforcements even show up. It also doesn’t help that the player HAS to playthrough this map every time they get a game over on the final chapter.
Overall Rating: Below Average
Endgame

Just going to come out and say it: This map is BULLCRAP! Especially the Lunatic version. Maids start out with Enfeeble and Hexing Rods, which isn’t anything the player hasn’t seen before, but when said maids are given Staff Savant and Inevitable End it makes conventional combat nigh impossible. The only real way to deal with these maids is with Pass and Rescue. When a game like this actively forces a very narrow way of beating it and punishes alternative methods it’s not just unfun, it’s bad design.
I’m not sure if the map’s trying to punish turtling or incentivize it. It throws hoards of enemies at the player from all sides but then dishes out a map wide attack reminiscent of what Ashera used to do in Radiant Dawn. Sure the player can avoid the map attack, but said map attack requires the player to play slower and hide behind something in order to not get hit. If the player takes too long they’ll be overwhelmed by enemy reinforcements, but if they rush ahead the map will destroy them.
Another massive problem is that the player is prevented from saving between the previous chapter and this one so risky strategies are even further discouraged. To its credit giving Takumi a skill that essentially lets him have the Awakening version of Pair Up is a smart move because it actually makes him threatening. Conquest might be the only game in the series where a sniper boss is actually threatening. Before I forget, I also find the enemy density to be a bit much for a map like this.
Overall Rating: FAIL!
Conquest Map Design Tally
Excellent: 6
Pretty Good: 4
Decent: 2
Meh: 5
Below Average: 3
Fail: 10
12 / 30 maps were decently designed or better.
Conquest’s Official Map Design Score: 40 %
__________________________________
In case you’re wondering what Conquest’s map design score would be without the shared chapters here’s what it would be:
Excellent: 6
Pretty Good: 3
Decent: 1
Meh: 5
Below Average: 2
Fail: 7
10 / 24 maps would be decently designed or better making that score 42 %.
______________________________________________
Final Thoughts: Conquest’s map design is overrated. A lot of maps rely on dumb gimmicks to be special, a good chunk of them can be trivialized effortlessly and it makes the same mistake Awakening made in that it resorts to cheap methods (like giving enemies OP skills) in order to artificially ramp up its difficulty.
To be fair, it does have the best map design of all the 3DS games but this has less to do with Conquest’s merits and more to do with how abysmal the map design of those other games are. I’ll even throw Conquest a bone and say that its map design is better than Holy War, Gaiden and the Tellius games. That being said, there are Fire Emblem games whose map designs are definitively better than Conquest’s (including, but not limited to, Thracia 776 and Mystery of the Emblem) and other games that one could argue have better map design than Conquest (like Blazing Sword and Shadow Dragon).
In short, Conquest is not the shining pillar of map design that most people make it out to be and it should not be treated as such.
No comments:
Post a Comment