Chapter 12
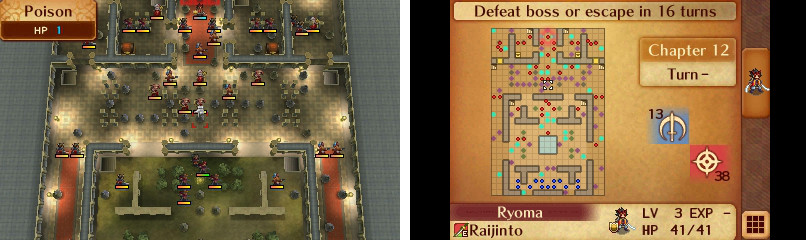
There are three different routes to approaching this map. There’s the middle route through the courtyard and the routes that are off to the side. This map’s turtle disincentive comes from the map objective itself. 16 turns is enough to get the player moving. Some players might find that generous but at the very least it’s there to get the player moving and it ensures that the player doesn’t take all day, which is more than what other maps have going for them.
The ninjas in the courtyard are challenging enemies, especially Saizo and Kagero’s Dual Guard. Saizo uses a Flame Shuriken and Kagero uses the Sting Shuriken in addition to a Steel Shuriken in Hard and Lunatic mode, which can shred armored units to pieces. The chapter also employs Shrine Maidens which use Silence, Entrap and Freeze. All three of these can pose a threat to the player and encourage careful positioning. The archers behind the pots above the courtyard serve a similar purpose. Ryoma is also a really challenging boss, but is fair and unlike Chapter 6 fighting him here isn’t as RNG reliant. Plus you don’t even have to fight him either. The Dragon Vein in the map is interesting and provides a series of strategic trade offs. Do you break the pots and make a mad dash toward the boss or not? I would have preferred it if the Dragon Veins instead let the player pick and choose which pots they’d be allowed to break, but this version works as is.

Then there are the pots. There are too many effects. Unless you read a guide, breaking them is a shot in the dark. This is a case where less would have been more. Just have one effect for all pots that are supposed to have a negative effect, and one effect for pots that are supposed to have a positive effect. Another problem is that breaking pots can either hurt you if you’re breaking a negative pot or help your enemies if you break a positive effect pot so it can seem a bit tedious to deal with. Like I mentioned before this is a nitpick because breaking the pots is not necessary for beating the chapter. Overall, this is map is very well designed.
Overall Rating: Excellent
Chapter 13
This map is alright. It gives you two different directions you could go in. You could either attack Takumi’s group or attack Orochi’s group. The player also has to deal with Wyvern Knights that are paired up with Armor Knights. The map makes good use of Reina’s high movement and attack range, which works as a means of getting the player to focus on their positioning. It should also be noted that two cavaliers on Reina’s side have Beast Killers, which could cause trouble for the player that doesn’t pay attention.
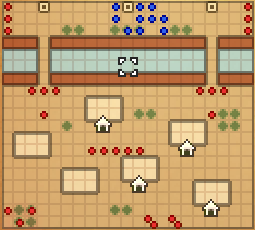
The map tries to threaten the houses with the outlaw, but the execution is a bit off since it takes a while before they’re ever in any real danger. Then there’s Scarlet. Her crit rate can be pretty high especially when you take her personal skill into consideration and on Lunatic Mode she even has a Killer Axe. She also has Death Blow too. Fighting Scarlet can also results in enemy reinforcement spawns which can feel pretty cheap since they’re powerful and can kill one of your units if you didn’t see them coming.
Overall Rating: Decent
Chapter 14
Chapter 14 is an example of a map that looks good on paper but can be undermined by a few powerful wyverns. All the player really has to do is fly toward the top of the map, kill the archers and enemies near the top and then proceed to fly over toward Kumagera and kill him. To its credit there’s at least the side objective of rescuing Keaton and treasure chests so there are valid reasons to play the chapter normally. 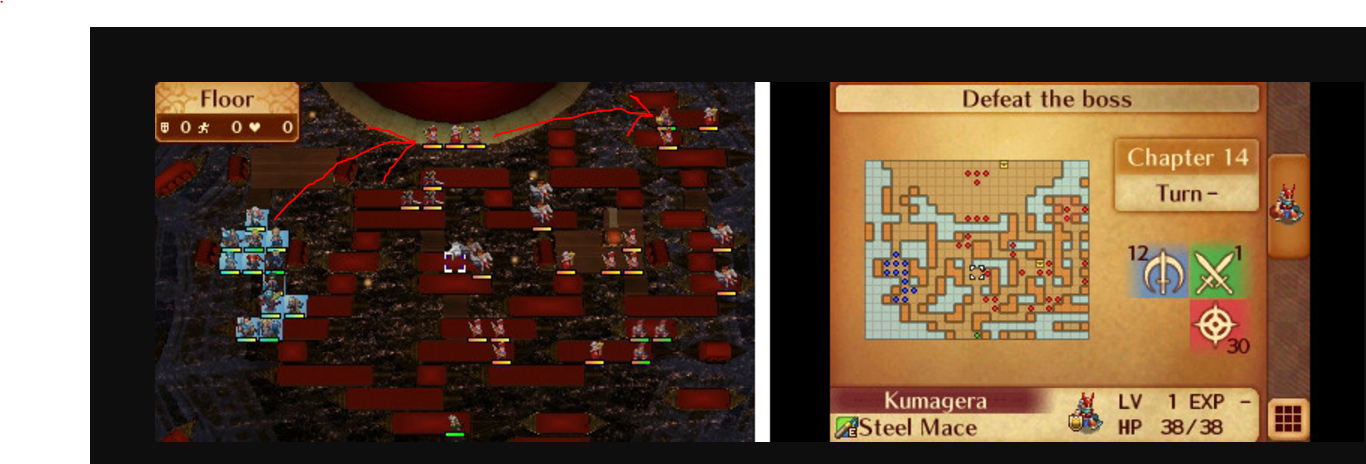
Overall Rating: Meh
Chapter 15
Eh, this map has issues. Before we get to those let’s talk about the Dragon Vein. Here the Dragon Vein gimmick adds a new dimension to the map. It provides a second option to approach it and potentially get a Speedwing. The Speedwing is a valuable item so chances are high that the player will actually try to get it, even if it means dealing with a powerful boss. Unfortunately the Dragon Vein is all the map has going for it.
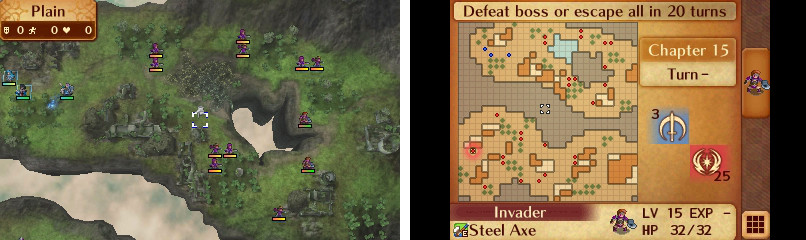
The boss is the only enemy that’s actually challenging or memorable to fight and the turn limit is generous to the point where it ceases to be an effective turtle disincentive. Replicate Azura cannot dance, which makes me wonder why the designers even bothered to make a replicate Azura. This chapter is way easier if Corrin is sufficiently trained and having only 3 units limits the player's options. Also, if the player chooses not to use the Dragon Vein gimmick then the map gets that much easier. Also, is it just me or does fighting the Hero boss come across as a little too RNG reliant?
Number of Conquest Bosses With Ridiculous Avoid: 3
Overall Rating: Below Average
Chapter 16
This map is awesome! The gold count is easily one of the most creative turtle disincentives in the series and it succeeds at getting the player to play faster without being punishing. The NPC boss kill idea is effective at forcing the player to move in different directions. There’s a lot of overlapping enemy unit ranges which means that the player has to think ahead in order to prevent getting killed. The map features a nice variety of enemy units from Sorcerers to Heroes to Berserkers.

Status staves are used effectively and work to slow the player down, resulting in the player possible getting less money. On the right side of the ship there’s a nice variety in enemy unit weapon inventory. There’s also enough magic and bow users present to prevent flyer skip from happening too. Also, this map provides the most meaningful choice in Fates: Shura or Boots. This is easily one of the best maps in Conquest.
Overall Rating: Excellent
Chapter 17
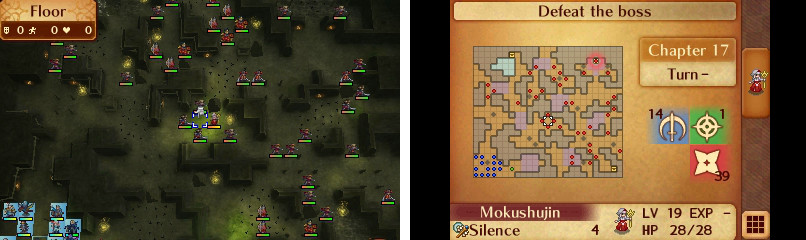
This is the one map I’m not entirely sure about in terms of its quality. It has positives going for it, but it also has negatives as well. The terrain is a good example of this. On the one hand it provides multiple routes to approach the map which is obviously a good thing. On the other hand, it’s also easy to use choke points against the enemy reinforcements this map throws at the player which undermines the power of said enemy reinforcements. Another example of this comes from Saizo. Keeping him alive is an interesting side objective and the reward definitely makes keeping him alive worth it, but he’s also pretty strong. On this map he’s immune to stat debuffs and post battle damage (ie damage inflicted from Grisly Wound and Poison Strike) which is a HUGE boon in a map that spams ninjas.
The Dragon Vein is another example of the hit or miss nature of the map. If used well it can make the map easier. If it’s not used well then it can be tedious. The enemy unit variety is lacking. The enemy unit types are predominantly ninjas, swordmasters and automatons. Most of these enemies are vulnerable to a sufficiently powerful Wyvern Lord like Camilla or Wyvern Lord Corrin. For starters Wyvern Lords have high HP and defense which means that they can tank damage from normal ninja and swordmaster attacks. Another advantage is that they also have weapon triangle advantage against both ninjas and swordmasters (axes beat Hidden Weapons and lances beat swords). Then there’s also Xander who can also counter attack the plethora of shurikens thrown the player’s way.
Last but not least we have Kotaro. I like the caltrops on his part of the map since it requires thinking on the player’s part in terms of how to deal with it and the presence of the other ninja make that aspect more challenging. Regarding Kotaro’s infamous avoid, somebody said it better than me: “Hey, it's FE6 Henning as a Master Ninja. Sword classes on thrones were a mistake, and Master Ninjas are no different” (Source: https://www.reddit.com/r/fireemblem/comments/5ha7nj/fates_map_discussion_thread_20_conquest_chapter_17/#bottom-comments_)
Number of Conquest Bosses With Ridiculous Avoid: 4
Overall Rating: Meh
_______________________________________
Thoughts on the Midgame: This is still a fairly solid part of the game. It’s a slight step down from the earlygame, but it still has enough fun chapters to keep it entertaining.
No comments:
Post a Comment